Table of contents
The installation of NICE DCV on Windows is straight-forward. For the best performance there are some prerequisites.
NICE DCV already performs very well on CPU only systems by streaming the desktop via CPU encoded H.264 stream. The best performance will be available leveraging a GPU. GPUs offer – especially for 3D heavy applications – among others the following advantages:
- DirectX and OpenGL hardware acceleration for applications
- Hardware acceleration for H.264 video streaming encoding
- Customizable server monitor resolutions
- Multi-monitor support
NICE DCV can be installed on any typical Windows OS or Windows Server to allow for best-performance remote Desktop access including 3D acceleration in case the machine is equipped with a nVidia or AMD GPU. DCV supports working from home scenarios with the best available performance compared to RDP and other tools.
In case you are interested in our ready-made Windows DCV AWS AMI to immediately rock and roll with DCV on AWS or give DCV a try here you go:
- High-End Windows Desktop – NICE DCV for NVIDIA-GPU with GRID drivers (g4)
- High-End Windows Desktop – NICE DCV for AMD-GPU Performance (g4ad)
Here is our usage guide for the Windows AMI: NICE DCV for Windows with UDP/QUIC (GPU, g4 with NVIDIA GRID Drivers). We have benchmarked GRID and Gaming drivers and GRID drivers perform better overall – here are the results: nVidia driver benchmarks on AWS.
The DCV QUIC/UDP protocol offers significantly higher frame-rates e.g. attractive for media artists or in difficult network conditions with higher latencies.
NICE DCV on Windows Installation – Step by Step
After installing the respective GPU driver in case needed (see below for more information) you can continue with the NICE DCV installation e.g. via RDP:
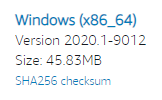
- Download the NICE DCV MSI file from the DCV download page: https://download.nice-dcv.com/
There you will find a DCV Server for Windows similar to the screenshot to the right. The URL is similar to https://d1uj6qtbmh3dt5.cloudfront.net/2020.1/Servers/nice-dcv-server-x64-Release-2020.1-9012.msi depending on the respective DCV version
- Run the MSI installer which will show the installation wizard:
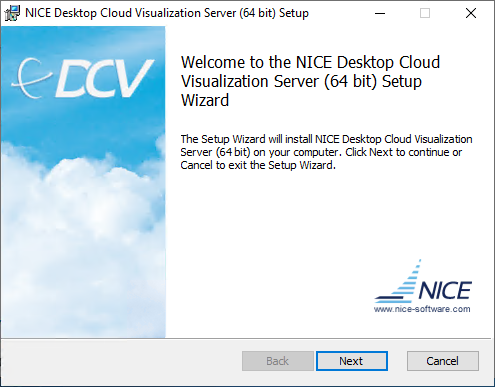
- Click “Next”
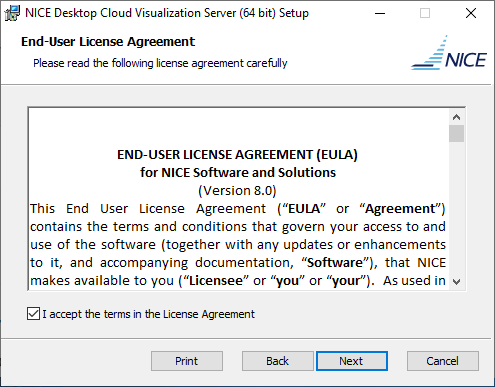
- Read, accept the EULA and click “Next”
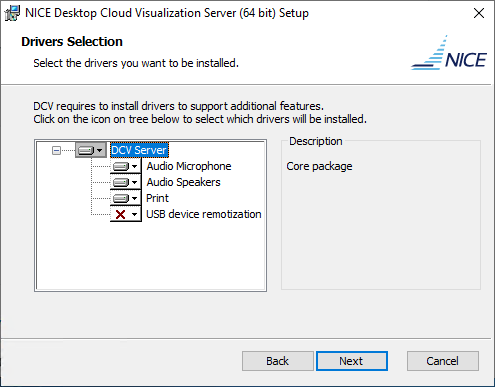
- Select if you want to use “USB device remotization” and click “Next”
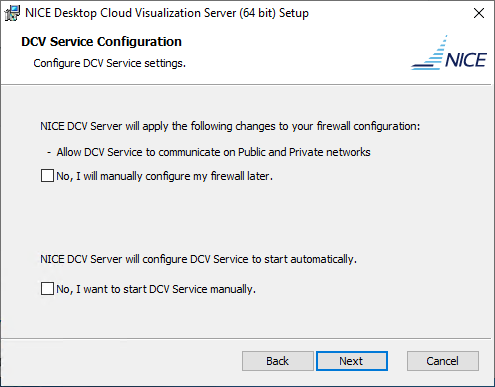
- Keep the defaults or configure your firewall later to allow incoming connections to 8443 and startup behavior of the DCV server – then click “Next”
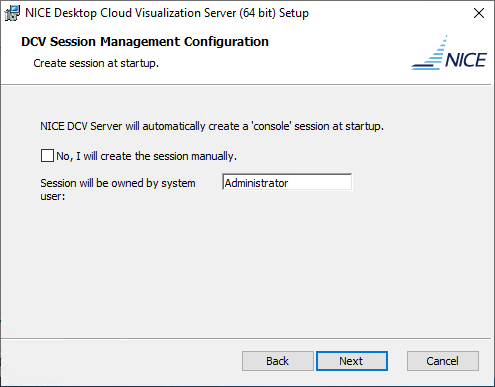
- Specify the owner for the automatic console session. Or, to prevent the automatic console session from starting after the installation is complete, select “No, I will create the session manually”. Click “Next”
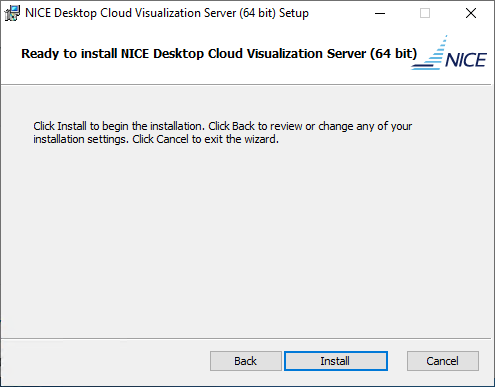
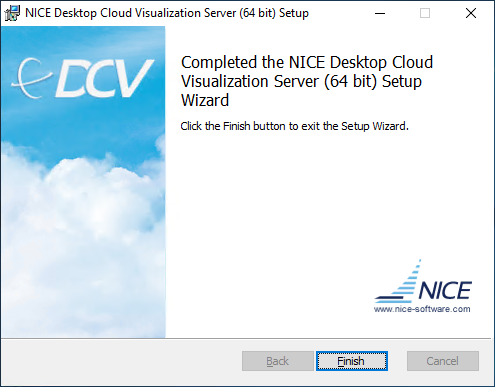
- Click “Install” which will after a minute show this completion screen:
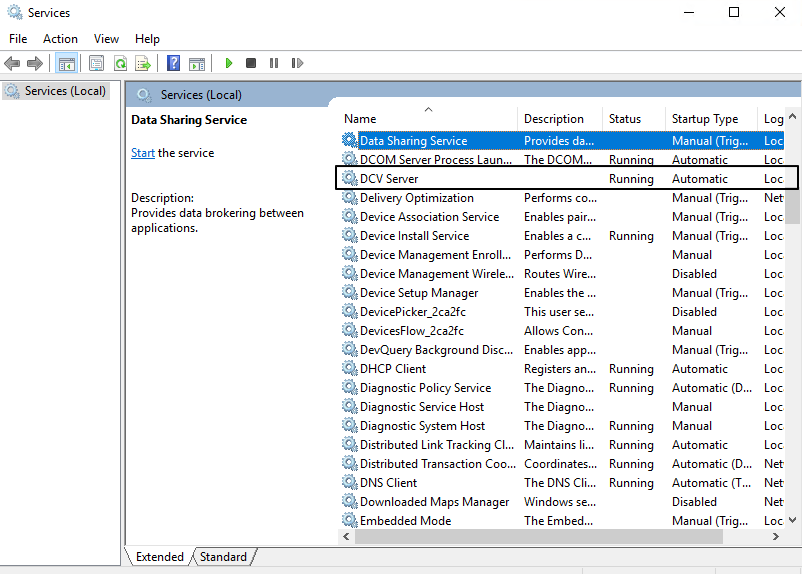
- Optional: Verify that the DCV server is running.
Open “Services” and search for the DCV server which should be in “Running” state:
- Connect to your DCV session at port 8443 by default. Don’t forget to allow inbound traffic on port 8443 in the firewall and/or security group.
After opening a web browser with https://IP_OR_SERVER_NAME:8443 replacing IP_OR_SERVER_NAME with your server address you should see the DCV login screen:
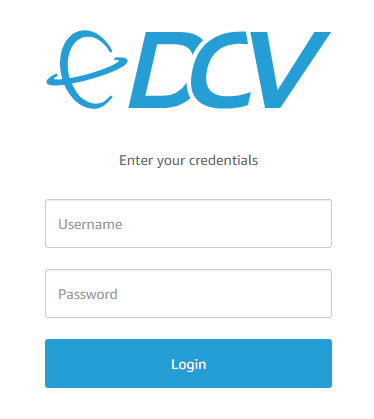
Now login with e.g. the Administrator user and password (or the session owner specified during installation).
In case you have a RDP session running this will be disconnected as DCV will replace the remote desktop protocol. Please see below in case you want to disable DCV authentication for testing. Please note that the best performance and USB device integration will be available with the native DCV client on Windows, MacOS or Linux.
To test the DCV performance install your favorite 3D application in case you can leverage a GPU or just try how DCV works for you with your applications.
You can check the metrics of your DCV connection after connecting to the DCV session via Settings (upper left wheel) -> Streaming Mode (Keep “Best responsiveness”) -> Display Streaming Metrics.
Tips and Tricks
Here are some tips how to successfully use NICE DCV on Windows
- QUIC/UDP for best performance in case of higher latencies
To enable the QUIC protocol in DCV based on UDP please follow the How to Enable QUIC guide. With QUIC the TCP handshakes are avoided which are causing lower FPS in case of higher latencies. - Firewall settings.
The default port of the NICE DCV server connection is at 8443. The port can can be changed as per this guide. It can happen that the firewalls do not let port 8443 pass e.g. in VPN settings. Please make sure that the during the installation port 8443 was automatically configured to be open in the firewall of the DCV server.
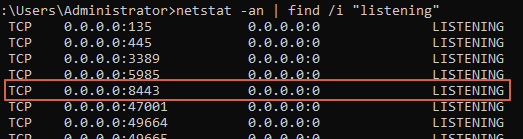
The connectivity to port 8443 on the DCV server can be verified by- first checking if the DCV server is active listening on 8443 by opening a cmd window on the DCV server machine and issuing:
netstat -an | find /i "listening"
to find the DCV server listening on 8443 as per above screenshot - connecting from another machine via web browser to the DCV server which is in the same network segment
- connecting from the client via telnet to the DCV server:
telnet IP_OR_SERVER_NAME 8443
- first checking if the DCV server is active listening on 8443 by opening a cmd window on the DCV server machine and issuing:
- Disable authentication. You can disable the DCV authentication with the following settings on the DCV server:
- Open the Windows Registry Editor.
- Navigate to the HKEY_USERS\S-1-5-18\Software\GSettings\com\nicesoftware\dcv\security\ key and select the authentication parameter. If there is no authentication parameter in the registry key, create one:
- In the left-hand pane, open the context (right-click) menu for the authentication key and choose New, string value.
- For Name, type authentication and press Enter.
- Open the authentication parameter. For Value data, enter either system or none.
- Choose OK and close the Windows Registry Editor.
How to install nVidia drivers on AWS G3/G4 instances
Downloading the nVidia drivers from S3 on Windows requires setting up credentials similar to this in Powershell (replace with your keys) if not done yet and then downloading the latest Grid drivers:
PS> Set-AWSCredential -AccessKey BABBABABABAABAABABA -SecretKey  KSKSKSKSSKSKSKSKSKSKSSS -StoreAs default
PS> $Bucket = "ec2-windows-nvidia-drivers"
$KeyPrefix = "latest"
$LocalPath = "$home\Desktop\NVIDIA"
$Objects = Get-S3Object -BucketName $Bucket -KeyPrefix $KeyPrefix -Region us-east-1
foreach ($Object in $Objects) {
    $LocalFileName = $Object.Key
    if ($LocalFileName -ne '' -and $Object.Size -ne 0) {
        $LocalFilePath = Join-Path $LocalPath $LocalFileName
        Copy-S3Object -BucketName $Bucket -Key $Object.Key -LocalFile $LocalFilePath -Region us-east-1
    }
}
Which will result in an output similar to below:
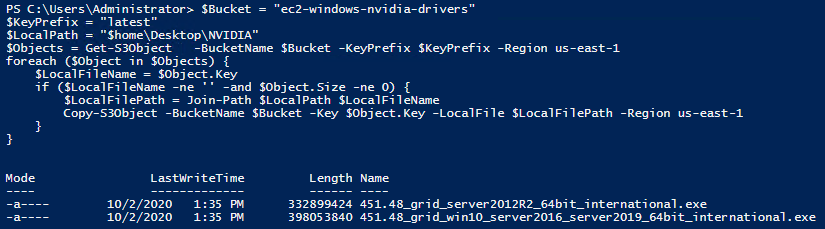
The drivers will be stored at Desktop\NVIDIA\latest by default

Run the respective driver installer as Administrator. Clicking on the defaults will install the driver resulting in the following screen:

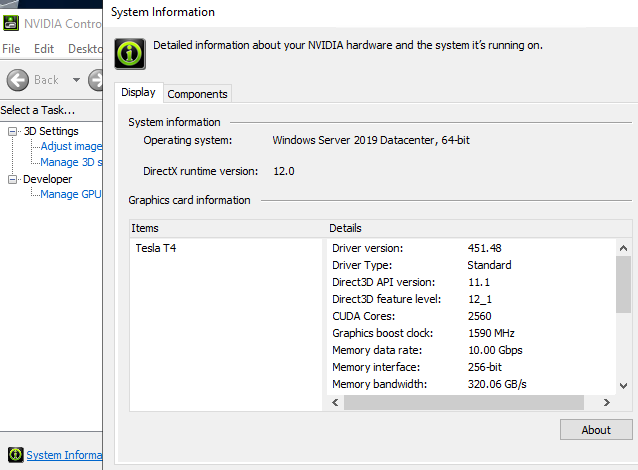
Right-clicking on the desktop allows to open the nVidia Control Panel to verify GPU details and the working driver:
For more background about NICE products have a look at our other technical guides related to NICE DCV and EnginFrame HPC and session management portal. If there are any questions please let us know.


