NICE Neutro is Windows task and session manager which was created to manage VDI sessions on Windows VDI servers. Neutro is task based so it executes tasks on the machine selected matching resource requirements like ncores>=32 AND mem_total>=64 AND nvidia.mem=8.
A Neutro task is more similar to instantiating a “Service”: once a task is started, it is possible to interact with the task instance by means of “Operations” associated with the Task like get the status, retrieve logfiles, end the task, …
NEUTRO Master Installation
Below is the example script which guides through the installation of Neutro on a Linux server:
################################################################################
# Copyright (C) 2019-2020 NI SP GmbH
# All Rights Reserved
#
# info@ni-sp.com / www.ni-sp.com
#
# We provide the information on an as is basis.
# We provide no warranties, express or implied, related to the
# accuracy, completeness, timeliness, useability, and/or merchantability
# of the data and are not liable for any loss, damage, claim, liability,
# expense, or penalty, or for any direct, indirect, special, secondary,
# incidental, consequential, or exemplary damages or lost profit
# deriving from the use or misuse of this information.
################################################################################
# Version v1.1
#
# Install NICE Neutro Session and Task manager
#
# download NEUTRO
#
wget https://dn3uclhgxk1jt.cloudfront.net/neutro/packages/2017.2/nice-neutro-master-installer-2017.2-137.jar

#
# install your preferred JRE (Java Runtime Environment)
# sudo yum install jre    # on RH/CentOS
# sudo apt install default-jre  # Ubuntu
# sudo apt-get install openjdk-8-jdk # in case there are complaints related to the java version

# edit the limits file and add "nofile" limit in order to set a value around
# 10000 and increase the stack
#
sudo echo "* - nofile 10000" >> /etc/security/limits.conf
sudo echo "* - stack 10240" >> /etc/security/limits.conf

# configure the firewall
# 5600 (to receive Client connections)
# 5557 (to receive Neutro Agent connections)
# additional ports typically not needed: 5700, 9160, 7000, 7199 (internal use)
# on RH/CentOS
sudo iptables-save
sudo firewall-cmd --zone=public --add-port=5600/tcp --permanent
sudo firewall-cmd --zone=public --add-port=5557/tcp --permanent
sudo firewall-cmd --reload
sudo firewall-cmd --list-all
sudo iptables-save | grep 5600

###################################################
# install NEUTRO master
# Please note: static IP needed
java -jar nice-neutro-master-installer-201?.?-*.jar --text
Output from the installation including input after “> “:
================================================================================
 Choose Install Location

 Choose the directory in which to install Neutro Master
================================================================================

Neutro Master will be installed in the following directory. To install in a
different directory choose another location.

Install directory   [default: /opt/nice/neutro-master]
>

The directory /opt/nice/neutro-master does not exist.
Do you want to create it? Y or N  [default: N]
> Y

================================================================================
 Java Selection

 Define which Java will be used by Neutro Master
================================================================================

Neutro Master will use the Java installed in the following directory. To make
Neutro Master use another Java choose another location.

Java base directory   [default:
/usr/lib/jvm/java-1.8.0-openjdk-1.8.0.252.b09-2.el7_8.x86_64/jre]
>

================================================================================
 Set IP address, Admin user and Cluster name

 Set the Neutro Master IP, the Neutro Master Admin user and the Neutro Cluster
name.
================================================================================

IP address of the current host.   [default: 192.168.178.21]
>

Administrator username. It is also the user in charge to run the Neutro Master.
Please do not use root, but a valid system user.   [default: neutro]
> efadmin

Cluster name.   [default: neutro]
>

================================================================================
 Neutro Master startup

 Choose whether Neutro Master should start at boot
================================================================================

Specify whether the Neutro Master services should be automatically executed when
the system is restarted.

Start Neutro Master at boot Y or N   [default: Y]
>

================================================================================
 Installing

 Please wait while Neutro Master is being installed
================================================================================

Unable to locate tools.jar. Expected to find it in /usr/lib/jvm/java-1.8.0-openjdk-1.8.0.252.b09-2.el7_8.x86_64/lib/tools.jar
100%[********************] The installation has been successfully completed.

Start Neutro Master running 'service neutro-master start' as root
After the installation is finished we can start the Neutro master:
root@host# service neutro-master start
# Output below:
Neutro Master is starting...
Neutro Master is started.                                  [  OK  ]
root@host# ./neutro-master status
Neutro Master is running with PID: <29410>
Now the Neutro master is running and we are ready to install our first Neutro Agent on a Windows machine.
In case you want to change the IP or other parameters of the Neutro configuration you can find the conf-file at ${NEUTRO_ROOT}/conf/master.conf (typically /opt/nice/neutro-master/conf/master.conf).
NEUTRO Agent Installation
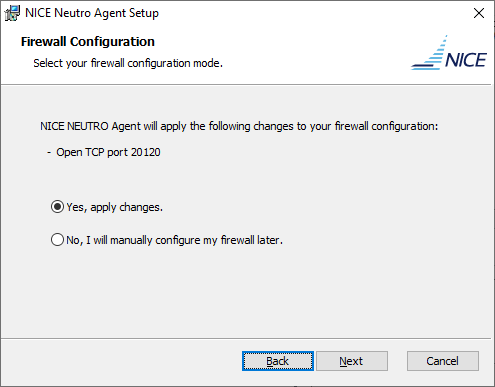
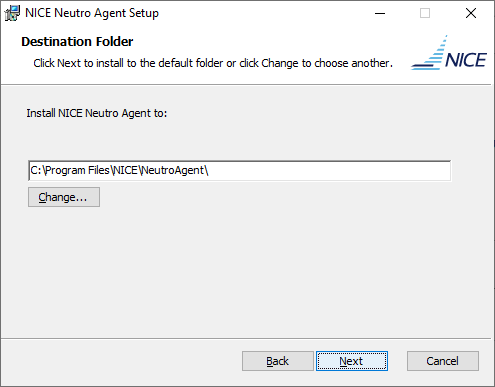
We can download the NEUTRO Agent MSI file from https://download.enginframe.com/. Executing the MSI as Windows administrator shows the following installation steps:
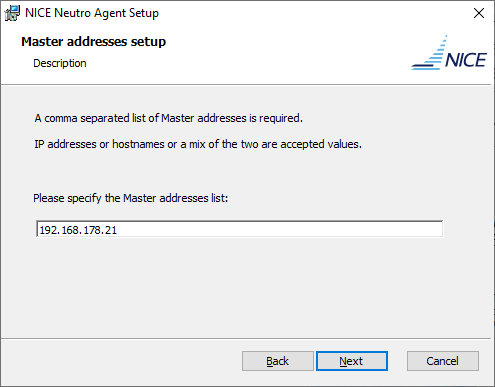
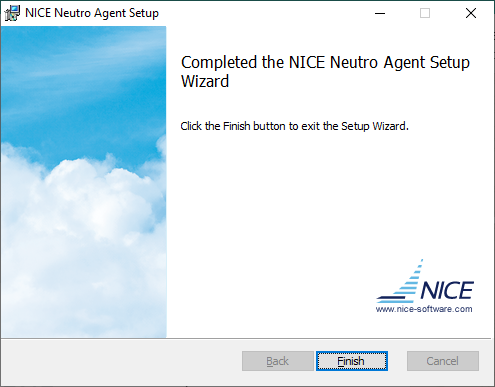
Now the Neutro Agent is up and running on the Windows machine and will connect to the Neutro Master specified during the installation.
In case of interest you can also install the NEUTRO agent automatically via commandline:
# The Neutro Agent installer is based on standard .msi technology and support "Unattended installation" as described in section "Installing the Neutro Agent". For example:
msiexec /q /i nice-neutro-agent-2017.0-Release-12345.msi RECONFIG=1 MASTER_ADDRESSES=10.10.10.10 DISABLE_FIREWALL=1
To check the available hosts available in the Neutro cluster we start the Neutro Shell and check the cluster (the commands entered are after the => prompt):
root@host# cd /opt/nice/neutro-master/bin
root@host# ./neutro-shell.sh
# Output
Insert commands:                              << Available commands
'hosts [--verbose] [<host1> <host2> ...]', 'host <hostname>'
'resources', 'resource <resourcename>'
'taskdefs', 'taskdef <taskdef>'
'tasks [--verbose] [<username>]', 'task <taskid>'
'tasksubmit <taskdef> <name>=<value>*'
'taskop <taskid> <operation> <name>=<value>*'
'cluster'
or 'help' or 'quit' or 'exit'
=> hosts
Host list (1) ==>
Host (name(a5) status(AVAILABLE) taskSlots(2) busySlots(1) ip(192.168.178.95))
# at the moment we have one Windows server in the cluster
=> host a5
Host (name(a5) status(AVAILABLE) taskSlots(2) busySlots(1) ip(192.168.178.95) resources list:
        - sessions: (1:Console:Active:A5\admin)
        - os: (Win_10)
        - ncpus: (1)
        - swp_total: (13312)
        - agent_ver: (17.2.137.0)
        - gpu: (nvidia)
        - nvidia.mem: (4095)
        - mem_total: (8192)
        - mem_avail: (770)
        - tags: (dcv2, gpu)                        << Tags
        - is_vm: (False)
        - swp_avail: (11158)
        - logged_users: (1)
        - cpu_bit: (64)
        - ncores: (4)
        - arch: ()
        - tasks: (45:task-interactive-dcv2)         << DCV session running
        - apps: ()
        - cpu_load: (5)
)
Tasks are executions of a script or applications on a Windows machine matching the resource requirements. Let’s look at some task definitions in the Neutro Master.
In the first example we show the definition of a sample PowerShell task and then a more complex example of the DCV session execution configured with a number of variables:
=> taskdef powershellTask               << show the sample PowerShell task
Name(powershellTask) Description(A task using powershell to be submitted)
Resource requirements(mem_avail > 50 AND cpu_load < 50)
Environment:
        Var name(ENVIRONMENT_VAR_1) value(environment variable 1 value)
Main Operation:
        Operation name (main) description()
                Option name(MAIN_INPUT_OPTION_1) default value(main_input_option_1 value) description(label 1)
Operations:
        Operation name (operation1) description(this is a simple operation)
                Option name(OPERATION_1_OPTION) default value(operation_1_option value) description(label)
        Operation name (getStatus) description(Retrieve the status of the task)
        Operation name (kill) description(Kill the task)
        Operation name (getStderr) description(Get the task main stderr)
        Operation name (dirlist) description(Dir list )
=> taskdef task-interactive-dcv2           << show a more complicated task
Name(task-interactive-dcv2) Description(The NICE EnginFrame Interactive task definition for DCV NG)
Resource requirements((os := "win_7" OR os := "win_8" OR os := "win_8.1" OR os := "win_10" OR os := "win_2008_server_r2" OR os := "win_2012_server" OR os := "win_2016_server") AND !(tags:="ef_interactive_closed_host") AND tasks !~ ":task-interactive-")
Environment:
        Var name(interactive_screenshot_height) value(100)
        Var name(interactive_tasks_version) value(1)
        Var name(registryAutoRunValueNameIaCommand) value(IaCommand)
        Var name(interactive_screenshot_width) value(160)
        Var name(registryDCVSecurityKey) value(HKEY_USERS\S-1-5-18\Software\GSettings\com\nicesoftware\dcv\security)
        Var name(interactive_remote_dcv2_depth) value(32)
        Var name(registryDCVWebUrlPathValueName) value(web-url-path)
        Var name(interactive_canaryprocess) value(explorer.exe)
        Var name(registryAutoRunValueNameIaScreenshot) value(IaScreenshot)
        Var name(interactive_remote_dcv2_geometry) value()
        Var name(interactive_remote_dcv2_loglevel) value(info)
        Var name(interactive_sessionUri) value()
        Var name(registryDCVInstallPathKey) value(HKEY_USERS\S-1-5-18\Software\GSettings\com\nicesoftware\dcv)
        Var name(registryDCVSecurityValueName) value(authentication)
        Var name(registryDCVLogValueName) value(level)
        Var name(registryAutoRunValueNameIaResolution) value(IaResolution)
        Var name(interactive_neutro_debug) value(false)
        Var name(TASK_LOG) value(%NE_TASK_WD%\log.%NE_TASK_ID%.txt)
        Var name(interactive_winlogoffdelay) value(0)
        Var name(interactive_canaryprocess_timeout) value(900)
        Var name(dcvService) value(dcvserver)
        Var name(registryDCVWebUrlPathKey) value(HKEY_USERS\S-1-5-18\Software\GSettings\com\nicesoftware\dcv\connectivity)
        Var name(interactive_loglevel) value()
        Var name(interactive_remote) value(dcv2)
        Var name(interactive_remote_dcv2_auth) value(dcv)
        Var name(registryAutoRunKey) value(HKLM\SOFTWARE\Microsoft\Windows\CurrentVersion\Run)
        Var name(interactive_logintimeout) value(600)
        Var name(registryDCVLogKey) value(HKEY_USERS\S-1-5-18\Software\GSettings\com\nicesoftware\dcv\log)
Main Operation:
        Operation name (main) description()
                Option name(interactive_remote_dcv2_storage_root) default value() description(Session storage root)
                Option name(interactive_command) default value() description(Job Command Script)
                Option name(interactive_cwd) default value() description(Current Working Directory)
                Option name(interactive_commandbase64) default value() description(Job Command Script Base64 encoded)
                Option name(interactive_remote_dcv2_owner_password) default value() description(Session owner password)
                Option name(interactive_logoff) default value() description(LogOff Script)
                Option name(interactive_remote_dcv2_max_concurrent_clients) default value() description(Session max concurrent clients)
                Option name(interactive_owner) default value() description(Session owner)
Operations:
        Operation name (getDisplayParameters) description()
        Operation name (getTaskLog) description()
        Operation name (getLog) description()
        Operation name (isReady) description()
        Operation name (getRemoteLog) description()
        Operation name (getStatus) description()
        Operation name (kill) description()
        Operation name (setTaskLogLevel) description()
                Option name(loglevel) default value() description(Log Level)
        Operation name (getScreenshot) description()
        Operation name (updateCredentials) description()
                Option name(interactive_remote_dcv2_owner_password) default value() description(Session owner password)
                Option name(interactive_remote_dcv2_guests) default value() description(Session guests)
        Operation name (getWindowsSession) description()
        Operation name (terminate) description()
                Option name(interactive_remote_dcv2_winlogoffdelay) default value() description(Windows LogOff Delay)
        Operation name (getWebUrlPath) description()
Integration with EnginFrame Views Session Management
EnginFrame Views is integrated with NEUTRO for Windows session management in addition to the integration with many popular Linux HPC schedulers like SLURM, SGE, LSF, …. The start of an interactive session is triggered by the action script of the VDI service which you can configure when clicking on the “Launch” button of the service in the EnginFrame service editor.
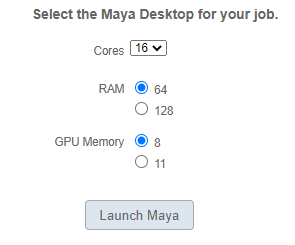
In the example below we have configured the action script to use 3 environment variables provided by the VDI session launch interface: cores_1, RAM_1 and gpumem_1:
vdi.launch.session  --submitopts "RESOURCE_REQUIREMENTS='ncores=${cores_1} \
      AND mem_total>${RAM_1} AND nvidia.mem=${gpumem_1}'"
The related EnginFrame session launch page could look similar to the interface displayed below offering to start e.g. a Maya Windows desktop with the required resources for the artist job:
Neutro cluster hosts will show up like this in the EnginFrame Views host view:
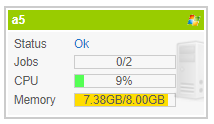
Neutro can be used in many versatile ways to submit and manage tasks on Windows based on complex resource requirements.
To configure Neutro as scheduler for interactive sessions in EnginFrame we configure in /opt/nice/enginframe/conf/plugins/interactive/interactive.efconf:
INTERACTIVE_DEFAULT_WINDOWS_JOBMANAGER=neutro
NEUTRO in AWS EC2
In this section we consider the configuration necessary to enable NEUTRO to run in EC2 with a NEUTRO Master on an EC2 Linux instance and the NEUTRO client on a Windows EC2 instance.
As NEUTRO does not recognize Windows Server 2019 out of the box and and newer nVidia cards we add the entries in the NEUTRO config file C:\Program Files\NICE\NeutroAgent\resources-conf.ini in the respective sections:
[CPU]
; in this section we add the Intel CPU
Intel_Xeon_Platinum_8175M = Intel.*Xeon.*Platinum.*8175M
[GPU]
; in this section we add the respective nVidia cards
nvidia_tesla_t3 = Tesla T3
nvidia_tesla_t4 = Tesla T4
[OS]
; in this section we add the Windows Server OS
Win_2019_Server = Windows.*Server.*2019
Save the configuration and restart the NEUTRO agent via Services.
To enable communication of the NEUTRO clients with the NEUTRO master we add the client communcation port 5557 to the inbound rules of our security group (please note all servers of the NEUTRO cluster should be part of the same security group):

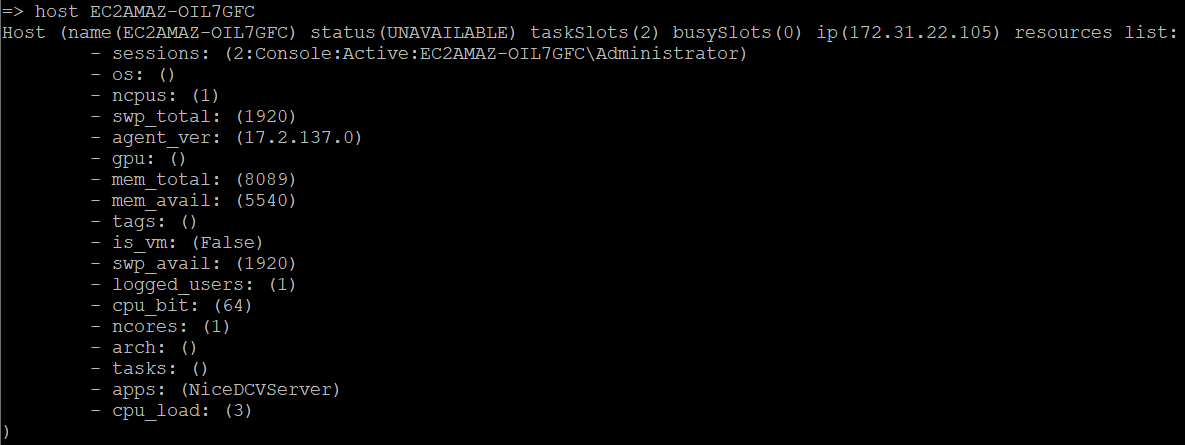
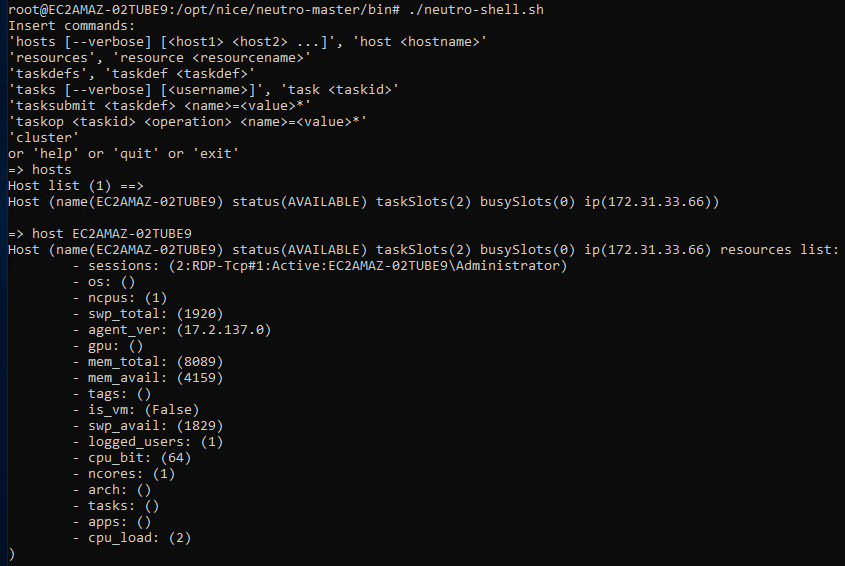
Then we can find the Windows NEUTRO host as part of our NEUTRO cluster. With a RDP connection:
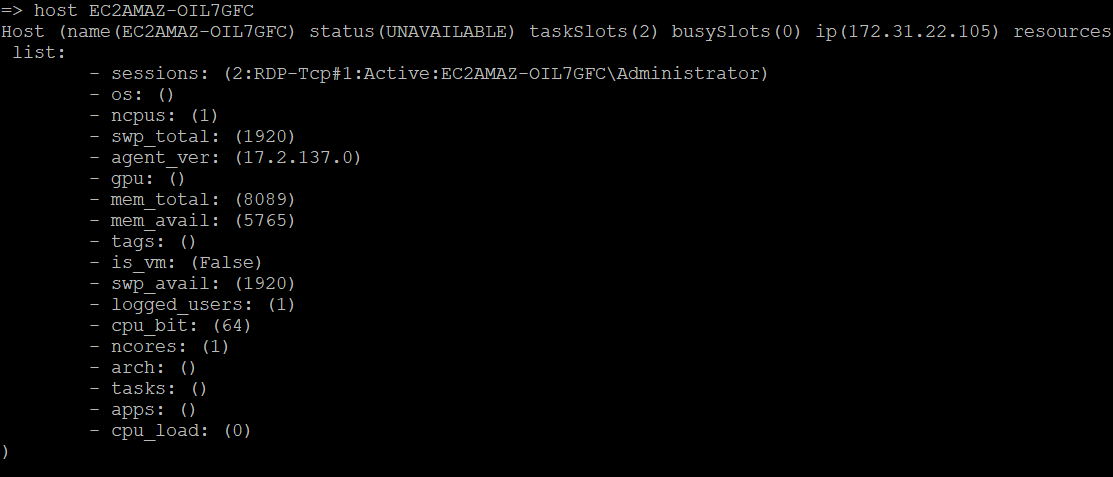
And after installing NICE DCV with a DCV connection (apps: (NiceDCVServer)):
Advanced: NEUTRO on Windows WSL
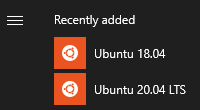
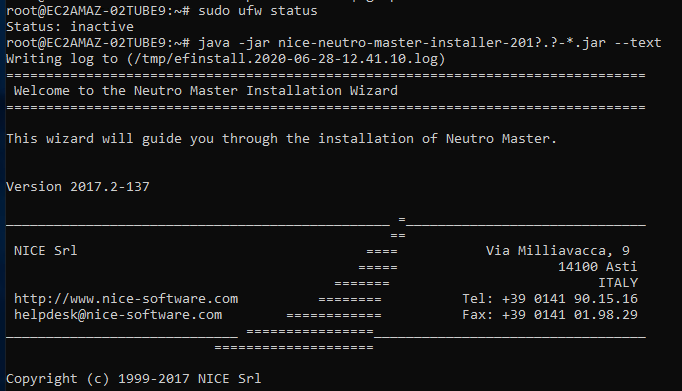
The Windows Subsystem for Linux offers installing different Linux distributions. After installing Ubuntu 18.04 in WSL we can update Ubuntu, add Java version 8 with sudo apt-get install openjdk-8-jdk (as Java version 11 has an issue with Cassandra used by Neutro), link /bin/sh to /bin/bash and proceed with installing Neutro on Ubuntu running inside Windows:
By default the system startup in Ubuntu is not supported but the installation succeeds:
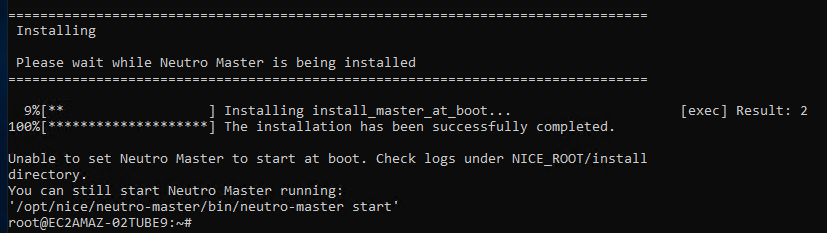
We then can start the Neutro master with /opt/nice/neutro-master/bin/neutro-master start and see that our first Windows machine already has joined the cluster (we previously have installed the Neutro agent on the Windows host):
Now we have our Neutro Master running inside Ubuntu on a Windows host using WSL to control our Neutro Windows cluster (Windows 10 or Windows Server 2019 are supported presently by WSL).
Advanced: NEUTRO Agent Configuration and Data
The NEUTRO Agent configuration and data can be found here:
- Neutro Agent Configurationfile:
C:\Program Files\NICE\NeutroAgent\NeutroAgent.exe.config
Here you can change e.g. the IP Address of the NEUTRO Master where the agent should connect to - Task Repository
C:\Windows\System32\config\systemprofile\Neutro\Data - NEUTRO resources config file
C:\Program Files\NICE\NeutroAgent\resources-conf.ini
Any questions just let us know.


