
With the Stable Diffusion (SD) cloud server created in cooperation with AI-SP you can instantly render stunning Stable Diffusion images independently on your own Cloud server with great performance. Stable Diffusion is a machine learning model developed by StabilityAI, in collaboration with EleutherAI and LAION, to generate digital images from natural language descriptions.
The neural network model can be used for other tasks too, like generating image-to-image translations guided by a text prompt. Here you can find more background about What is Stable Diffusion. Please login to Hugging Face hosting Stable Diffusion and request access to stable-diffusion-v1-4 to comply with license and access regulation.
The CreativeML OpenRAIL License specifies: You can’t use the model to deliberately produce nor share illegal or harmful outputs or content CompVis claims no rights on the outputs you generate, you are free to use them and are accountable for their use which must not go against the provisions set in the license. You may re-distribute the weights and use the model commercially and/or as a service. If you do, please be aware you have to include the same use restrictions as the ones in the license and share a copy of the CreativeML OpenRAIL-M to all your users (please read the license entirely and carefully).
Update August 12, 2023: Stable Diffusion XL 1.0 Linux Server updated with latest Stable Diffusion XL 1.0 version and Vlad WebUI and Torch 2.0. Includes redundant token merging for faster batches, merging of checkpoints, Lora, dreambooth training and much more. Updated NeRF solutions.
Overview of Features of the Automatic Stable Diffusion integration (Detailed overview of features including examples):
- Original txt2img and img2img modes
- One click install and run script
- Outpainting
- Inpainting
- Prompt Matrix
- Stable Diffusion Upscale
- Attention, specify parts of text that the model should pay more attention to
- a man in a ((tuxedo)) – will pay more attention to tuxedo
- a man in a (tuxedo:1.21) – alternative syntax
- Loopback, run img2img processing multiple times
- X/Y plot, a way to draw a 2 dimensional plot of images with different parameters
- Textual Inversion
- have as many embeddings as you want and use any names you like for them
- use multiple embeddings with different numbers of vectors per token
- works with half precision floating point numbers
- Extras tab with:
- GFPGAN, neural network that fixes faces
- CodeFormer, face restoration tool as an alternative to GFPGAN
- RealESRGAN, neural network upscaler
- ESRGAN, neural network upscaler with a lot of third party models
- SwinIR, neural network upscaler
- LDSR, Latent diffusion super resolution upscaling
- Resizing aspect ratio options
- Sampling method selection
- Interrupt processing at any time
- Low memory footprint: 4GB video card support (also reports of 2GB working)
- Correct seeds for batches
- Prompt length validationget length of prompt in tokens as you type
- get a warning after generation if some text was truncated
- Generation parametersparameters you used to generate images are saved with that image
- in PNG chunks for PNG, in EXIF for JPEG
- can drag the image to PNG info tab to restore generation parameters and automatically copy them into UI
- can be disabled in settings
- Settings page
- Running arbitrary python code from UI (must run with –allow-code to enable)
- Mouseover hints for most UI elements
- Possible to change defaults/mix/max/step values for UI elements via text config
- Random artist button
- Tiling support, a checkbox to create images that can be tiled like textures
- Progress bar and live image generation preview
- Negative prompt, an extra text field that allows you to list what you don’t want to see in generated image
- Styles, a way to save part of prompt and easily apply them via dropdown later
- Variations, a way to generate same image but with tiny differences
- Seed resizing, a way to generate same image but at slightly different resolution
- CLIP interrogator, a button that tries to guess prompt from an image
- Prompt Editing, a way to change prompt mid-generation, say to start making a watermelon and switch to anime girl midway
- Batch Processing, process a group of files using img2img
- Img2img Alternative
- Highres Fix, a convenience option to produce high resolution pictures in one click without usual distortions
- Reloading checkpoints on the fly
- Checkpoint Merger, a tab that allows you to merge two checkpoints into one
- Custom scripts with many extensions from community
- No token limit for prompts (original stable diffusion lets you use up to 75 tokens)
- InstructPix2Pix – powerful prompt-based Image Editing Instructions (Linux server)
Check out the Automatic Wiki for more background and how to.
1. Start and Access the AWS Stable Diffusion GPU cloud server
In the AWS Marketplace please subscribe (you can follow How to Launch a Marketplace Server in the AWS Cloud) to the
- Stable Diffusion Cloud Server (Linux) supporting T4 and A10G nVidia GPUs – OR –
- Stable Diffusion Cloud Server (Windows) supporting T4 and A10G nVidia GPUs
and start the instance on an AWS GPU server (actually the Stable Diffusion neural network was trained on AWS GPU instances with nVidia A100; in case you need the vCPU limit increased e.g. as a new AWS user you can request a quota increase for g4dn or g5 instances here: https://docs.aws.amazon.com/servicequotas/latest/userguide/request-quota-increase.html; the default g4dn.xlarge e.g. needs 4 vCPUs). The default server type is g4dn.xlarge which will give you a nVidia T4 GPU with 16 GB GPU memory and 16 GB system memory which is a great platform to start with Stable Diffussion. The server also supports g5 instances with A10 GPUs offering 24 GB of GPU memory to generate larger images. Please always make sure to turn your cloud server off after using.
For the remote desktop connection we will use the NICE DCV high-end remote desktop software and login to our cloud server with the following steps (for the Linux server please follow the usage instructions on how to create the password to login: ssh -i <your-pem-key> ubuntu@<public-dns> sudo passwd ubuntu, please also see our video: NICE DCV Remote 3D on AWS – NI SP DCV AMI or follow this guide: How to Connect to your AWS Cloud Server with NICE DCV):
- Connect to the Stable Diffusion server:
- Open a web browser window at
https://PUBLIC_DNS_NAME:8443 -or- https://EXTERNAL_IP_ADDRESS:8443
replacing the capital part with the address of your Stable Diffusion server
—– OR —- - Download the NICE DCV client for your OS from https://download.nice-dcv.com/. E.g. for Windows download: DCV Windows Client
- Open the DCV client and enter the “public DNS name” of your server or “IP address”.
- Open a web browser window at

Accept the security warning related to the dynamically created certificate (the connection is secure) clicking “Trust and connect” and login with user Administrator and the password retrieved from the AWS “Connect” information (please follow steps 1-5 at the AWS Windows login guide to retrieve the password; on the Linux server please use the user ubuntu and the password you have created):
2. How to Run the Stable Diffusion GUI in Your Server
2.1 SD STARTUP on Windows
When you log into your Stable Diffusion Cloud Server you will see the following icons on your desktop:
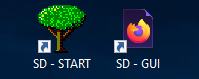
On the desktop you can find:
- Start command “SD – START” to start Stable Diffusion. Double-Clicking will open a command shell which will load the Stable Diffusion model and start the webserver at http://localhost:7860.
- Stable Diffusion user interface “SD – GUI” created by Automatic. Double-Clicking will open the web browser firefox with the SD GUI.
- Link to the libraire.ai prompt library to get ideas for new prompts (next to it in the upper middle)
- 2 directories with examples of images which have been created with text2image (txt2img-images – output) and img2img (txt2img-images – output)
How to start the Stable Diffusion GUI
- Double-click on the SD – START icon and wait a couple of minutes (the first run might take longer related to loading the AMI showing Loading weights [7460a6fa] ….) until the command windows looks similar to below after loading the gigabytes of model data:
Please note: In case of g5 with A10 GPUs it can happen that the GPU is not visible for the Windows OS at the first startup of the instance (please check the Task Manager). In this case please reboot the instance and the A10 GPU should by visible. If not please let us know.

2.1.1 Support for Stable Diffusion 2.1
The Windows SD AMI now offers SD version 2.1 support as well. The default checkpoint of the v2.1 AMI is the SD 2.1 model. In case you switch to another model you might encounter memory limitations as the memory of the previouos checkpoint is not freed up. In this case you can reboot the instance via the AWS instances interface or on the commandline when logged in.
We have added some examples in the txt2image folder rendered with the new v2.1 model as prompting is different with v2.1 compared to v1.x. You can find more background on how to use SD v2.x in the SD discussions on Reddit. Typically the number of steps is half compared to v1.x so e.g. try with 8 steps. Images should be rendered at 768×768 or larger.
Please start the GUI with the “SD-Start” desktop icon provided as it adds the –xformers option to the startup parameters – otherwise the images created might be black. With the following option in the startup icon settings you can also add the initial model to start the GUI with as changing a model might sometimes lead to a an out of memory: –ckpt models/Stable-diffusion/YOUR_CHECKPOINT. On Windows the GPU memory is partially shared which leaves less GPU memory for the stable diffusion model so SD on Linux typically is more efficient.
2.2 SD Startup on Linux
Our Stable Diffusion and NeRF Linux Cloud server supports the following neural network solutions:
- Stable Diffusion AUTOMATIC repository (this guide)
- NeRF – Create 3d scenes with neural networks yourself (NeRF Guide)
- Stable Diffusion Deforum repository focussing on video creation (Deforum SD Guide)
After login to the desktop open a Linux terminal from the left bar (see icon to the right) and start the Stable Diffusion GUI: ![]()
cd AUTOMATIC1111-SD-WEBUI
./start-AUTO.sh
Wait a couple of minutes (the first run might take longer up to around 25 minutes related to loading the GBs of the AMI showing “Loading weights [7460a6fa] ….”; EBS bandwidth for the g4dn.xlarge instance is up to 3.5 GBit/s). In case you encounter a python error on the command line this could be related to an error in the Webgui related to handling multiple checkpoints. In this case please stop the Webgui with ctrl-c on the command line and restart it.
2.2.1 Support for Stable Diffusion 2.0 and 2.1
The Linux SD AMI now offers SD version 2.0 support as well. The default checkpoint of the v2.1 AMI is the SD 2.1 model. In case you switch to another model you might encounter memory limitations as the memory of the previouos checkpoint is not freed up. In this case you can reboot the instance via the AWS instances interface or on the commandline when logged in. You can also adapt the start-AUTO.sh script to specify the initially desired checkpoint with option: –autolaunch –xformers –ckpt models/Stable-diffusion/YOUR_CHECKPOINT .
We have added some examples in the txt2image folder rendered with the new v2.0 model as prompting is different with v2.0 compared to v1.x. You can find more background on how to use SD v2.0 in the SD discussions on Reddit. Typically the number of steps is half compared to v1.x so e.g. try with 8 steps. Images should be rendered at 768×768 or larger.
2.3 Stable Diffusion GUI
Wait for the SD – GUI to automatically open in the firefox browser after loading has completed or double-click “SD – GUI” and the Stable Diffusion user interface will open in the firefox web browser:
![Stable Diffusion GUI
shield maiden, insanely detailed and intricate, hyper maximalist, elegant, hyper realistic, super detailed, 8K, vivid colors, midday, open sky, ultra-realistic, nature photography, photographic rendering, realistic textures, color dynamic, octane render, cinematic lighting, enhance, soft light beam, perfect face
Negative Prompt
((((ugly)))), (((duplicate))), ((morbid)), ((mutilated)), [out of frame], extra fingers, mutated hands, ((poorly drawn hands)), ((poorly drawn face)), (((mutation))), (((deformed))), ((ugly)), blurry, ((bad anatomy)), (((bad proportions))), ((extra limbs)), cloned face, (((disfigured))), out of frame, ugly, extra limbs, (bad anatomy), gross proportions, (malformed limbs), ((missing arms)), ((missing legs)), (((extra arms))), (((extra legs))), mutated hands, (fused fingers), (too many fingers), (((long neck))), (((logo))), (((watermark)))](https://www.ni-sp.com/wp-content/uploads/2022/10/image-5.png)
3. Stable Diffusion: Text to Image How To
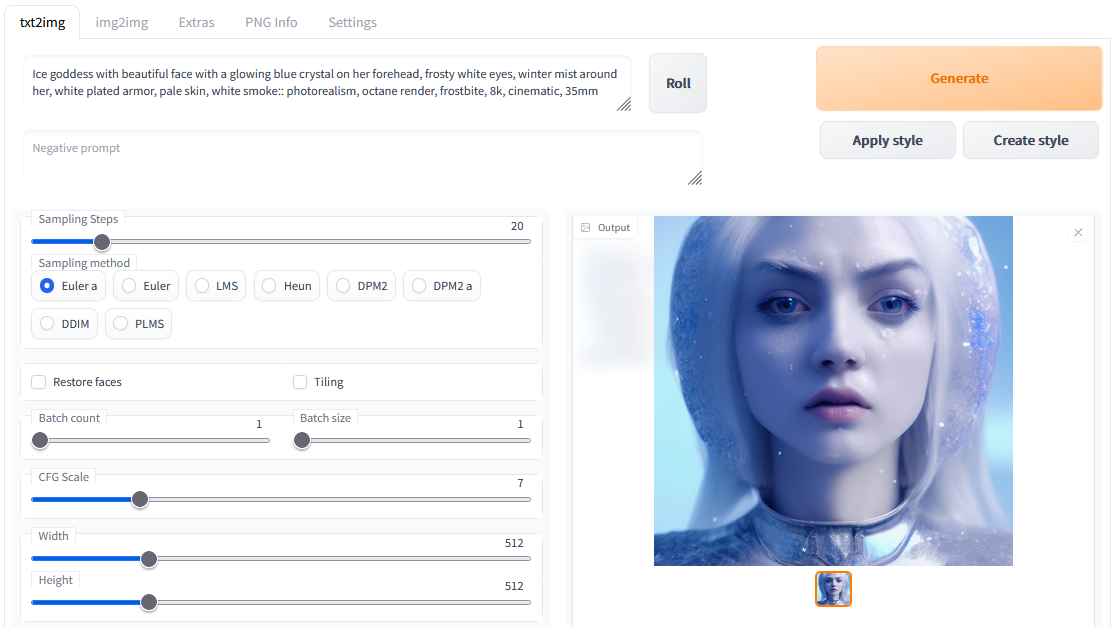
The Stable Diffusion GUI offers a number of controls including tooltips when hovering over the controls:
- Prompt: Here you enter the description of the image to be created by the Stable Diffusion neural network. Get ideas for prompts from the last chapter on this page or e.g. libraire.ai or lexica.art
- Sampling Steps: how many iterations Stable Diffusion shall perform. Between 30-50 are a good start
- Batch count: every image will be created with a different seed. More images take longer to render
- Creativeness/CFG Scale: How much should Stable Diffusion follow your prompt. Higher will try to match you prompt better but can become chaotic regards the images created
- Seed: -1 is for random seeds. Same seed will create the same image in case resolution and sampler are identical
- Resolution: resolutions up to 512 x 512 can be rendered well on the 16 GB T4 GPU in g4 instances. Higher resolutions might lead to errors. Upscaling is available at factor 2 or 4
- Sampling method: how the image is retrieved from the neural network
- Tiling: Generate seamless tiled images
- Restore faces: Use additional steps leveraging GFPGAN
Enter your prompt in the prompt box and click “Generate” to the right. You can monitor the resource usage with Windows Task Manager.
Depending on the size of the image and steps the rendering will take a few seconds (the first generation will load the data into memory and GPU and will take a couple of minutes to finish). The generated image/s will be shown after rendering. The progress will be shown in the command window. You can also enable a progress bar in the GUI in the Settings.
Generated images are automatically stored in the linked directories on the desktop. You can download images via the DCV built-in download functionality located at the upper left of the DCV window from the Desktop (please copy the desired image to the Desktop first). In case you want to retrieve the prompt used for a previous image you can check the logfiles generated.
4. Stable Diffussion: Image to Image How To
Clicking the “img2img” tab in the upper tab row starts the “Image to Image” mode.
Select an image e.g. from of the folders on the desktop and configure the “Denoising Strength” to control how much the start image controls the output. Higher values lead to stronger influence of the initial image.
Click “Generate” and the new image will be rendered, stored into “img2img-images – output” on the Desktop and displayed as follows:
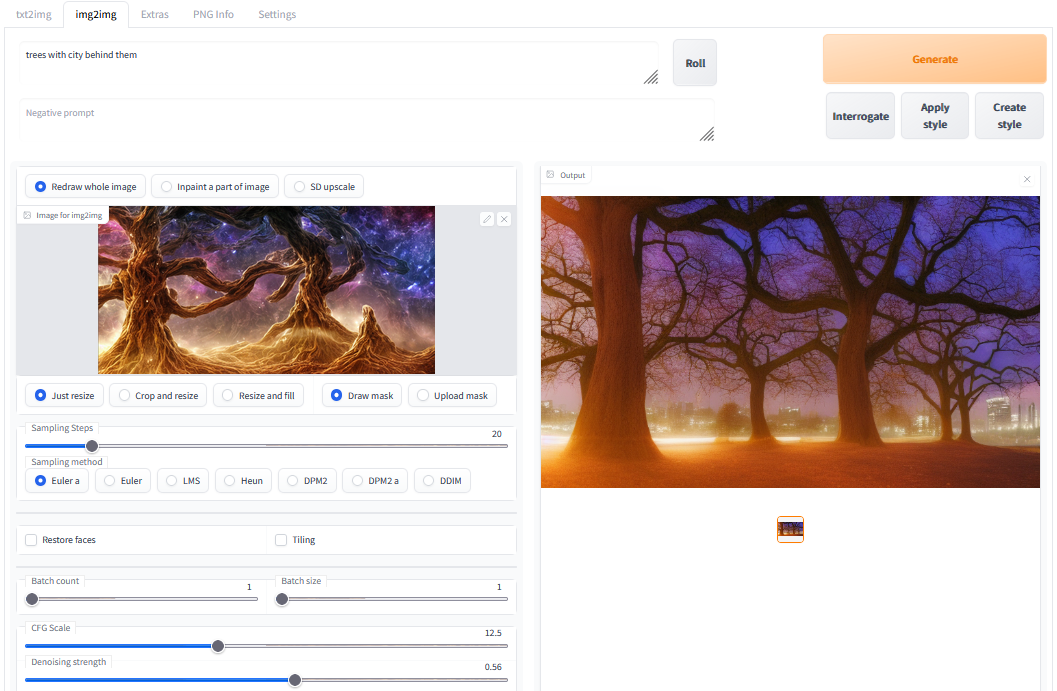
Initial image in the above example was:
The GUI offers a number scripts for additional functionality:
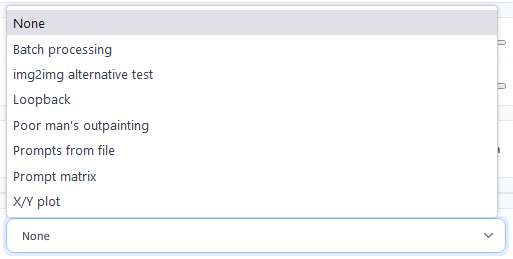
The “Loopback” script e.g. offers to automatically create an images based on the present start image and use the latest image generated as next image “moving forward” from image to image automatically. Also the “text2image” tab offers additional scripts.
The “Extras” tab supports upscaling and other image manipulation. The “PNG Info” tab allows to retrieve information stored in the PNG image file like prompt and other paramaters.
Check out the “Settings” tab to control where the images are stored and control other parameters.
5. Text 2 Mask – Automatic Image 2 Image Inpainting How To
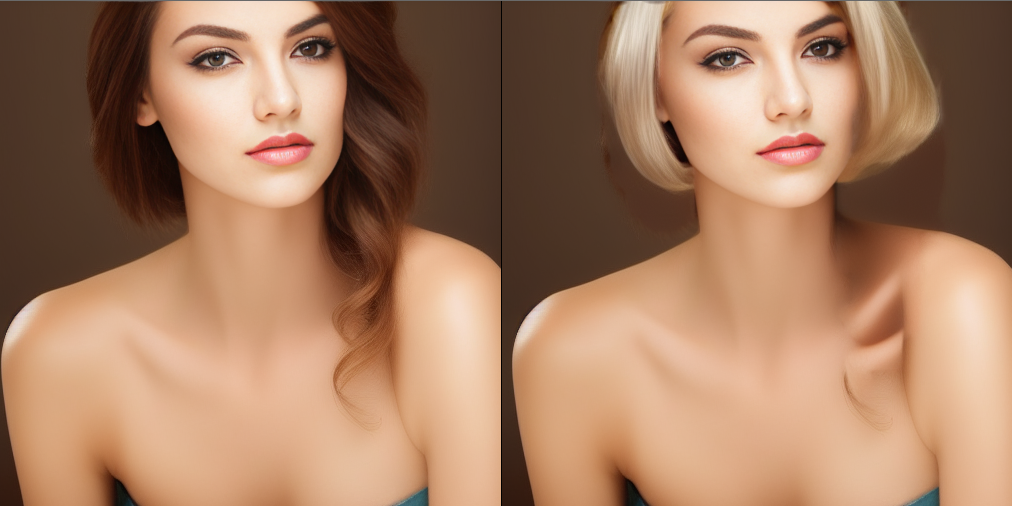
In the script section of the image 2 image tab you can find the txt2mask script.
- In the script interface you can specify the image content to mask – e.g. hair (in the right example), floor, wall, …
- When you hit generate the clipseg neural network will segment the image into different parts and mask the part specified by the text (the hair in the right example)
- The prompt will be used for inpainting the masked part (sometimes this will not work perfectly but gives a great head start). You might want to use the new Stable Diffusion 1.5 checkpoint which was specifically trained for inpainting and often gives better results.
Usage Hints:
- Adjust the
Mask Precisionfield to increase or decrease the confidence of that which is masked. Lowering this value too much means it may select more than you intend. - The Mask Prompt allows you to search for multiple objects by using
|as a delimiter. For example, if you entera face|a tree|a flowerthen clipseg will process these three items independently and stack the resulting submasks into one final mask. This will likely yield a better result than had you searched fora face and a tree and a flower. - You can use the
Mask Paddingoption to increase the boundaries of your selection. For example, if you entera red shirtas your prompt but find that it’s not quite selecting the whole shirt, andMask Precisionisn’t helping, then padding may be a good way to address the issue. - Use the
Negative mask promptto subtract from areas selected byMask prompt. For example, if your prompt isa faceand the negative prompt iseyesthen the resulting mask will select a face without selecting the eyes.
6. ControlNet – Additional Input Conditions for Images
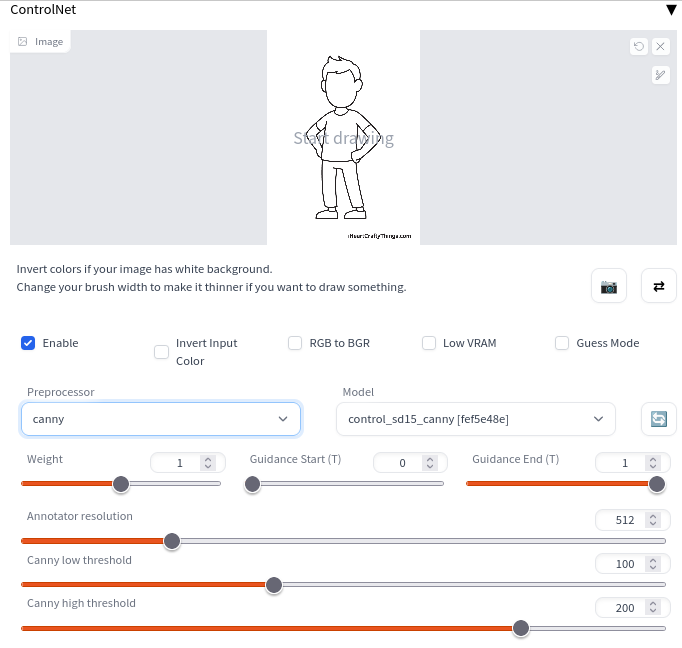
Controlnet for Stable Diffusion – “a neural network structure to control pretrained large diffusion models to support additional input conditions” offers e.g. edge detection on source images, image depth maps, posing, … as input for image creation. The models can be download here. The github page provides more background.
2 checkpoints are necessary to run Controlnet. The standard SD checkpoint 1.5 and one of the Controlnet checkpoints trained on of the respective task with support for the 1.5 checkpoint. You can draw or upload a source image which will be used as base for the operation control like edge detection (canny), depth map, …. The controlnet checkpoint can be selected in the interface shown above available in txt2img and img2img.
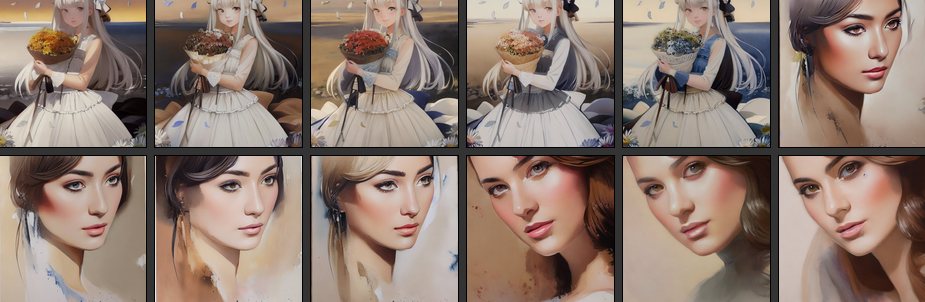
Here is an example of a couple of images created via Controlnet with same overall features:
7. InstructPix2Pix – Change Images Based on Editing Instructions
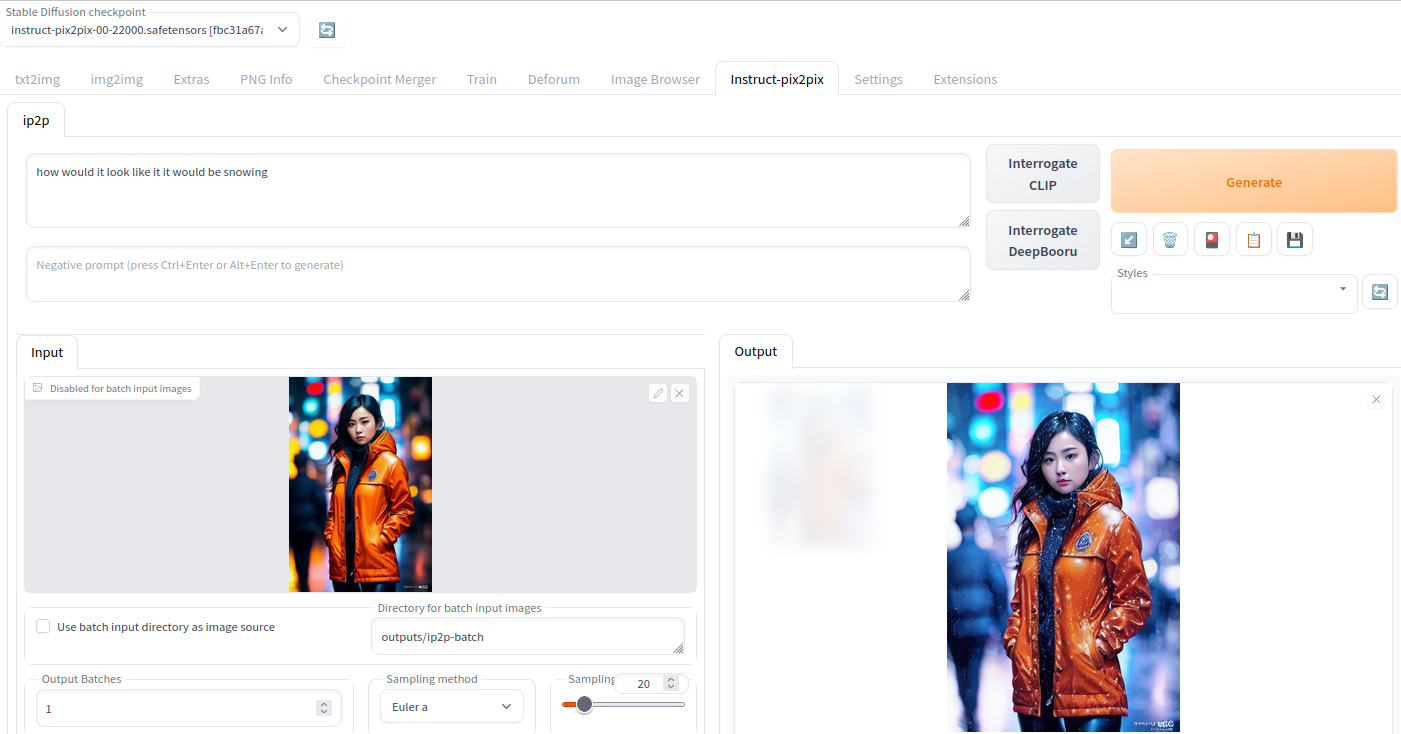
InstructPix2Pix allows for “editing images from human instructions: given an input image and a written instruction that tells the model what to do, our model follows these instructions to edit the image”. The AUTO SD WebGUI offers a very easy to use integration via the integration into the img2img interface.
You select an image in the lower left input field via drag&drop and specify a prompt as usual. After a few seconds the image in the output area will show the modications – in our example snow was added to the source image.
Here you can download the instructpix2px model. More information about the instructpix2px license.
8. Stable Diffusion License, Tips and Tricks
More information on Stable Diffusion from the Stable Diffusion github page:
Stable Diffusion is a latent text-to-image diffusion model. Thanks to a generous compute donation from Stability AI and support from LAION, we were able to train a Latent Diffusion Model on 512×512 images from a subset of the LAION-5B database. Similar to Google’s Imagen, this model uses a frozen CLIP ViT-L/14 text encoder to condition the model on text prompts. With its 860M UNet and 123M text encoder, the model is relatively lightweight and runs on a GPU with at least 10GB VRAM. See this section below and the model card.
The weights are available via the CompVis organization at Hugging Face under a license which contains specific use-based restrictions to prevent misuse and harm as informed by the model card, but otherwise remains permissive. While commercial use is permitted under the terms of the license, we do not recommend using the provided weights for services or products without additional safety mechanisms and considerations, since there are known limitations and biases of the weights, and research on safe and ethical deployment of general text-to-image models is an ongoing effort. The weights are research artifacts and should be treated as such.
The CreativeML OpenRAIL M license is an Open RAIL M license, adapted from the work that BigScience and the RAIL Initiative are jointly carrying in the area of responsible AI licensing. See also the article about the BLOOM Open RAIL license on which our license is based.
You can use the built-in file up/download functionality of the remote desktop DCV software to e.g. download rendered images. The button is located to the upper left in the DCV window.
How to use Highres. Fix in Web Gui
- First Pass (the initial image settings) should be set to the standard for your model, either 512×512 or 768×768.
- Then click the high res button, and set the width and height to whatever you want the end result to be. E.g. 1080×1920.
- Set Highres steps to e.g. 20, but you can do more for the same effect on the end result that higher steps would do on the original.
Stable Diffusion Feature Guide with Examples
The Stable Diffusion Automatic WIKI has a Detailed overview of features including examples.
Pro tip: Right-click the “Generate” button and the generation of images will continously run – at the same time you can still change parameters and interrupt the generation.
Negative Prompts
Negative prompt is a way to use the Stable Diffusion in a way that allows the user to specify what he doesn’t want to see, without any extra load or requirements for the model. The feature has found extreme popularity among users who remove the usual deformities of Stable Diffusion like extra limbs with it. In addition to just being able to specify what you don’t want to see, which sometimes is possible via usual prompt, and sometimes isn’t, this allows you to do that without using any of your allowance of 75 tokens the prompt consists of.
If you want to create beautiful persons you can try use this negative prompt:
((((ugly)))), (((duplicate))), ((morbid)), ((mutilated)), [out of frame], extra fingers, mutated hands, ((poorly drawn hands)), ((poorly drawn face)), (((mutation))), (((deformed))), ((ugly)), blurry, ((bad anatomy)), (((bad proportions))), ((extra limbs)), cloned face, (((disfigured))), out of frame, ugly, extra limbs, (bad anatomy), gross proportions, (malformed limbs), ((missing arms)), ((missing legs)), (((extra arms))), (((extra legs))), mutated hands, (fused fingers), (too many fingers), (((long neck)))
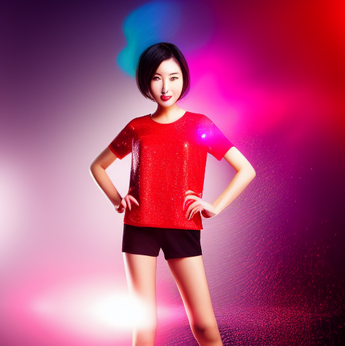
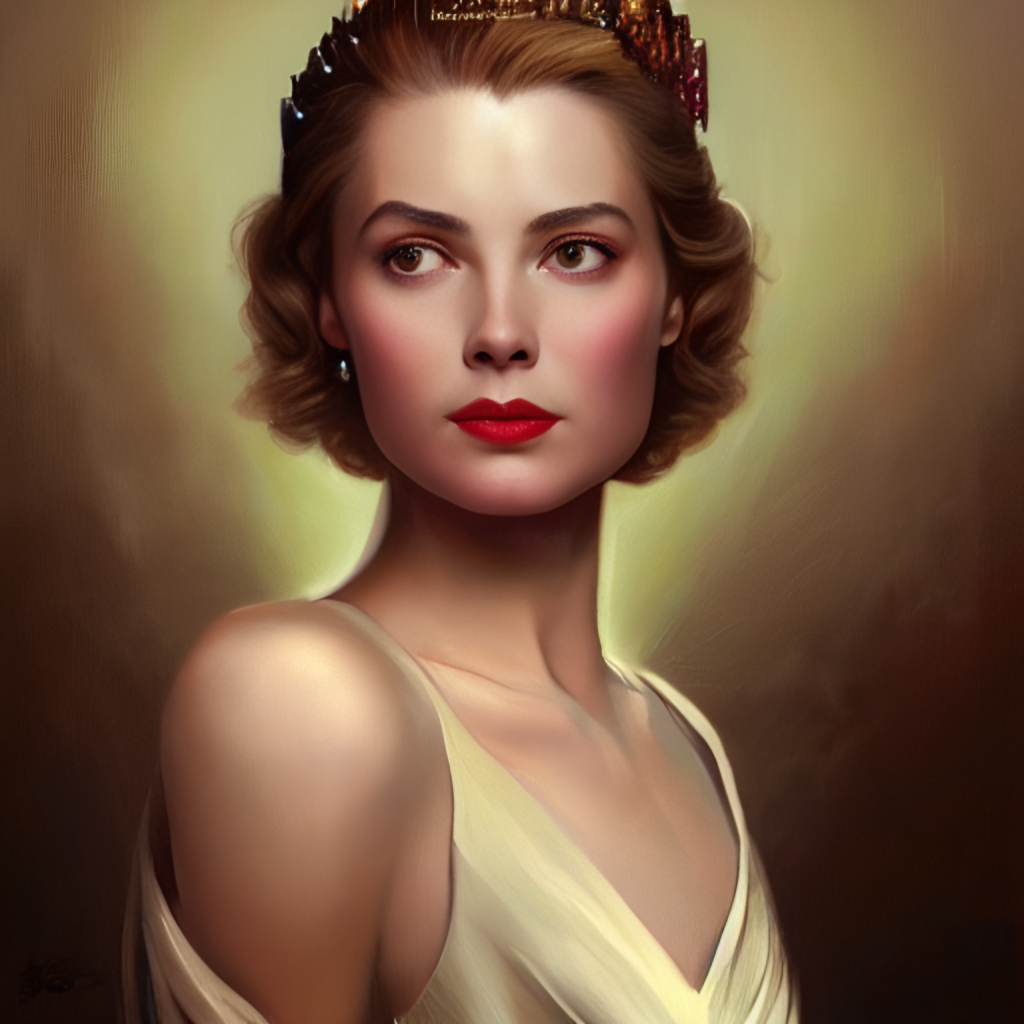
Example (replace ACTRESS_x place holders with real actress name):
Prompt: ((French)) [ACTRESS_1:ACTRESS_2:0.75] [ACTRESS_3:ACTRESS_4:0.85] Feminine,((Perfect Face)), (Intricate),(High Detail), (bokeh), light beam
Negative prompt: ((((ugly)))), (((duplicate))), ((morbid)), ((mutilated)), [out of frame], extra fingers, mutated hands, ((poorly drawn hands)), ((poorly drawn face)), (((mutation))), (((deformed))), ((ugly)), blurry, ((bad anatomy)), (((bad proportions))), ((extra limbs)), cloned face, (((disfigured))), out of frame, ugly, extra limbs, (bad anatomy), gross proportions, (malformed limbs), ((missing arms)), ((missing legs)), (((extra arms))), (((extra legs))), mutated hands, (fused fingers), (too many fingers), (((long neck))), (((logo))), (((watermark)))
Weighted Prompts
You may weight different sections of the prompt to tell the sampler to attach different levels of priority to them, by adding :(number) to the end of the section you wish to up- or downweight. For example consider this prompt:
tabby cat:0.25 white duck:0.75 hybrid
This will tell the sampler to invest 25% of its effort (creation steps) on the tabby cat aspect of the image and 75% on the white duck aspect (surprisingly, this example actually works). The prompt weights can use any combination of integers and floating point numbers, and they do not need to add up to 1.
Pro tip: Select the part of the prompt you want to change the weights on, CTRL arrow up or down to change the weights.
Prompt Matrix
Separate multiple prompts using the | character, and the system will produce an image for every combination of them. For example, if you use a busy city street in a modern city|illustration|cinematic lighting prompt, there are four combinations possible (first part of prompt is always kept):
a busy city street in a modern citya busy city street in a modern city, illustrationa busy city street in a modern city, cinematic lightinga busy city street in a modern city, illustration, cinematic lighting
Working with image 2 image (from reddit comment)
Take an output of txt2img that I like, pop it into GIMP, and do things like shop out extra arms, legs, fingers, and use clone tool to smooth out anything that looks weird. This is just to get a crude foundation to get img2img going.
Then I run img2img like 10 times with varying low strength values, like 0.2, 0.25, etc. up to 0.5. Strength is the key flag in img2img because it is the “creative liberty” knob for SD. Lots of the outputs look like crap but usually there is one or two that didn’t change the image too much and got it closer to what you’re going for.
So then you pick the best of those and pop it into GIMP again. Now you can overlay the best parts from the original image over the top of the second one and repeat the process. I do that until it’s good quality or I get bored, and then run the result through upscaler to make it bigger (I might do upscale with GFPGAN first).
See also above for automatic masks created by a description via text 2 mask. Here is another image 2 image guide.
How to use Stable Diffusion checkpoints, Model Weights for upscaling and specifically trained models
This wiki gives an overview on available models: https://upscale.wiki/wiki/Model_Database including guides how to use them, training databases, etc: https://upscale.wiki/wiki/Main_Page. Additional models can be found at publicprompts.art.
The Stable Diffusion 1.5 checkpoint with a focus on inpainting was released by RunwayML. After accepting the terms you can download the v1.5 model weights checkpoint.
Just copy a model checkpoint into the “models/Stable-diffusion” directory in the stable-diffusion folder. After restarting Automatic SD you can select the new model checkpoint in the upper left pulldown menu. In the prompt add the respective style to trigger image generation supported by the selected model.
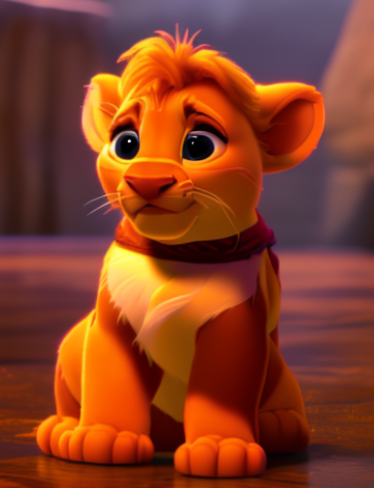
E.g. the Mo Di model https://huggingface.co/nitrosocke/mo-di-diffusion which can be used by adding “modern disney” to the prompt. The latest Stable Diffusion Linux AMI includes the bonus Vectorartz_Diffusion checkpoint which can be used with vectorartz style after selecting the checkpoint.
Here is an overview page of available models for Stable Diffusion which you can download and directly apply into your SD GUI to generate images in the respective style: civitai.com. Here is an overview of images generated from different models with same prompt from reddit user.
How to remove an object with image 2 image
Guide to image 2 image object removal: https://www.sagiodev.com/blog/how_to_remove_object_with_ai_image_inpainting/
Updates about Stable Diffusion: https://rentry.org/sdupdates2.
9. Example prompts for Stable Diffusion v1.4 and v1.5
- A well-preserved library among hidden ruins, matte painting, trending on artstation
- A highly realistic, true to life portrait of a young woman, by karol bak, james jean, tom bagshaw, rococo, sharp focus, trending on artstation, cinematic lighting, hyper realism, octane render, 8 k, hyper detailed
- Tiny room, isometric diorama cutaway render of Fallout 2, by Curzio Ferrara, octane render, 100mm, 3D blender render, 8k, vibrant, incredibly detailed, high contrast, grungy, colorful, contest winner
- A distant futuristic city full of tall buildings inside a huge transparent glass dome, In the middle of a barren desert full of large dunes, Sun rays, Artstation, Dark sky full of stars with a shiny sun, Massive scale, Fog, Highly detailed, Cinematic, Colorful
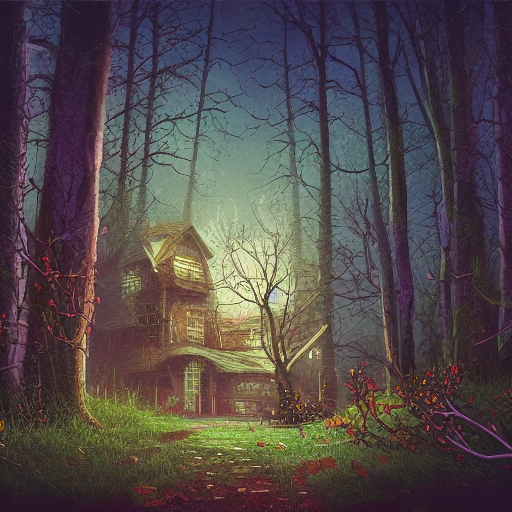
- haunted house, trees in the distance, tree leaves on the ground, mischievous and gorgeous, vibrantcolors, awardwinning, intricate, insanely detailed, digitalpainting, conceptart, horrorvibes
- Ultra realistic photo, red hair girl working in a bar, beautiful face, intricate, highly detailed, smooth, sharp focus, art by artgerm and greg rutkowski and alphonse mucha — (try replacing red hair with ginger, fire hair, …. )
- A place in wales, tucked out of view magic happens, only seen by a few. for just one day, for only just one hour. The last summer’s day break at Gelli aur. there you must follow a winding trout stream. search all the oaks with a tiny light beam, inspired by ( greg rutkowski ) and charlie bowater
- Asian Brad Pitt, high quality, trending on Artstation
- A beautiful view of hogwarts school of witchcraft and wizardry and the great lake, concept art, by Thomas Kinkade, architecture, atmospheric, sense of awe and scale, artstation HQ
- Ice goddess with beautiful face with a glowing blue crystal on her forehead, frosty white eyes, winter mist around her, white plated armor, pale skin, white smoke:: photorealism, octane render, frostbite, 8k, cinematic, 35mm
- A levitating and floating beautiful detailed haussmannian palace villa by Neil Blevins and Gilles Beloeil, M C Escher and Lee Madgwick over a lake by Cyril Rolando, colorful, geometric, Vray, illuminated windows, Transcended Beyond Physics, Gravitational Anomaly, Detailed Realistic, Detailed Digital Painting, vibrantcolors, 5-Dimensional, Assassin’s Creed, Color Grading, Ektachrome
- Blonde-haired beautiful Warrior Queen, in fantasy armor, with Iron crown, cross symbolism, with a fit body, dark forest background, hopeful light, photorealistic, painted by artgerm, Akihiko yoshida, sakimichan, krenz cushart, low angle shot, digital painting
- Ultra realistic photo, princess peach in the mushroom kingdom, beautiful face, intricate, highly detailed, smooth, sharp focus, art by artgerm and greg rutkowski and alphonse mucha
- portrait of a woman made of cracked marble. high contrast. macro photography
- A beautiful neon cyberpunk city street at night, apartment, skyscrapers, by alphonse mucha caravaggio monet ,4K resolution, 8K resolution, a lot of Decoration and embellishments, sci-fi, photorealistic, highly detailed, sharp focus, clean 8k, volumetric lighting, octane render, ceramic
- A modern teenage girl’s bedroom, indirect sunlight, high detail, lush decor, realistic, photorealistic, 8k
- Ana de Armas as Red Sonja, portrait, detailed features, intricate, highly detailed, sharp focus
- (painting of girl from behind looking a fleet of imperial ships in the sky, in a meadow of flowers. ) by donato giancola and Eddie Mendoza, elegant, dynamic lighting, beautiful, poster, trending on artstation, poster, anato finnstark, wallpaper, 4 k, award winning, digital art, imperial colors, fascinate view
- A painting of a beautiful woman in the middle of a city street by Daniel F Gerhartz, William Adolphe Bouguereau, John William Waterhouse, and Thomas Kinkade. City skyline. Chiaroscuro. Volumetric Lighting
- award-winning nature shot, photography framing composition branches, excellent composition, rule of thirds, wasatch mountains, scenic, overcast, early autumn, thunder storm clouds, ray tracing reflections, woods, lake, kayak on lake, shoreline, desaturated, ultra-detailed, detailed and intricate, dslr, 25mm, 8k, sharp focus
- Create images similar to Midjourney (example):
Professional oil painting of establishing shot of canal surrounded by verdant ((blue)) modern curved rustic Greek tiled buildings, professional majestic oil painting by Ed Blinkey, Atey Ghailan, Studio Ghibli, by ((Jeremy Mann)), Greg Manchess, Antonio Moro, (((trending on ArtStation))), trending on CGSociety, volumetric lighting, dramatic lighting, (dawn), water, canoes, refraction Negative prompt: amateur, poorly drawn, ugly, flat Steps: 100, Sampler: LMS, CFG scale: 9, Seed: 918873140, Size: 704×512, Model hash: 7460a6fa, Batch size: 3, Batch pos: 0 - 3d led night table light, 3d optical illusion lamp of a [OBJECT] Steps: 20, Sampler: Euler a, CFG scale: 12
Other resources for prompts:


