Introduction to NeRF
Create your own NeRF 3D Scenes and videos with the ready-made Linux GPU Cloud server. Here is a sample of a video rendered from a NeRF 3D scene created from a video (you can find an ad using NERF at the end of the page):
Table of Contents
- Introduction to NeRF
- Table of Contents
- What Is NeRF?
- Accelerating 1,000x With Instant NeRF
- How to run your own NeRF and create a movie of the 3D Scence
- Summary of How to Run Nerfstudio and More Background
- More Background on NeRF
What Is NeRF?
Overview on what NeRF is from the nVidia Blog: NeRFs use neural networks to represent and render realistic 3D scenes based on an input collection of 2D images.
Collecting data to feed a NeRF is a bit like being a red carpet photographer trying to capture a celebrity’s outfit from every angle — the neural network requires a few dozen images taken from multiple positions around the scene, as well as the camera position of each of those shots.
In a scene that includes people or other moving elements, the quicker these shots are captured, the better. If there’s too much motion during the 2D image capture process, the AI-generated 3D scene will be blurry.
From there, a NeRF essentially fills in the blanks, training a small neural network to reconstruct the scene by predicting the color of light radiating in any direction, from any point in 3D space. The technique can even work around occlusions — when objects seen in some images are blocked by obstructions such as pillars in other images.
Accelerating 1,000x With Instant NeRF
While estimating the depth and appearance of an object based on a partial view is a natural skill for humans, it’s a demanding task for AI.
Creating a 3D scene with traditional methods takes hours or longer, depending on the complexity and resolution of the visualization. Bringing AI into the picture speeds things up. Early NeRF models rendered crisp scenes without artifacts in a few minutes, but still took hours to train.
Instant NeRF, however, cuts rendering time by several orders of magnitude. It relies on a technique developed by NVIDIA called multi-resolution hash grid encoding, which is optimized to run efficiently on NVIDIA GPUs. Using a new input encoding method, researchers can achieve high-quality results using a tiny neural network that runs rapidly.
How to run your own NeRF and create a movie of the 3D Scence
Our NeRF and Stable Diffusion Linux Cloud server supports the following neural network solutions:
- Stable Diffusion AUTOMATIC repository with many powerful features (SD Guide)
- Stable Diffusion Deforum repository focussing on video creation (SD Deforum Guide)
- NeRF – Create 3d scenes with neural networks yourself (this NeRF Guide); Includes Nerfstudio
1. Get access to our server with NeRF pre-installed
To create your own 3D NeRF scenes first start the AWS instance to create your own GPU Cloud Server by subscribing to the AWS Marketplace Stable Diffusion + NeRF Linux offering. Then access your Linux NeRF server as follows:
- The NeRF server is based on Linux Ubuntu 22. You can access your server according to this guide:
Connect to your Linux instance with ssh (putty or any other ssh client). E.g. ssh -i <your-pem-key> ubuntu@<public-dns> sudo passwd ubuntu. - Login to your server and configure a password for user “ubuntu” which we will use to login via DCV Remote Desktop with the following command: sudo passwd ubuntu
- Download the NICE DCV client for your OS from https://download.nice-dcv.com/. E.g. for Windows: DCV Windows Client
- Open the DCV client and enter the “public DNS name” of your server or “IP address”.

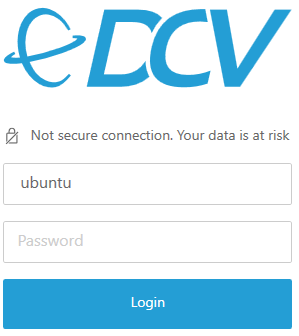
Accept the security warning related to the dynamically created certificate (the connection is secure) clicking “Trust and connect” and login with user ubuntu and the password specified above:
This will open the desktop:
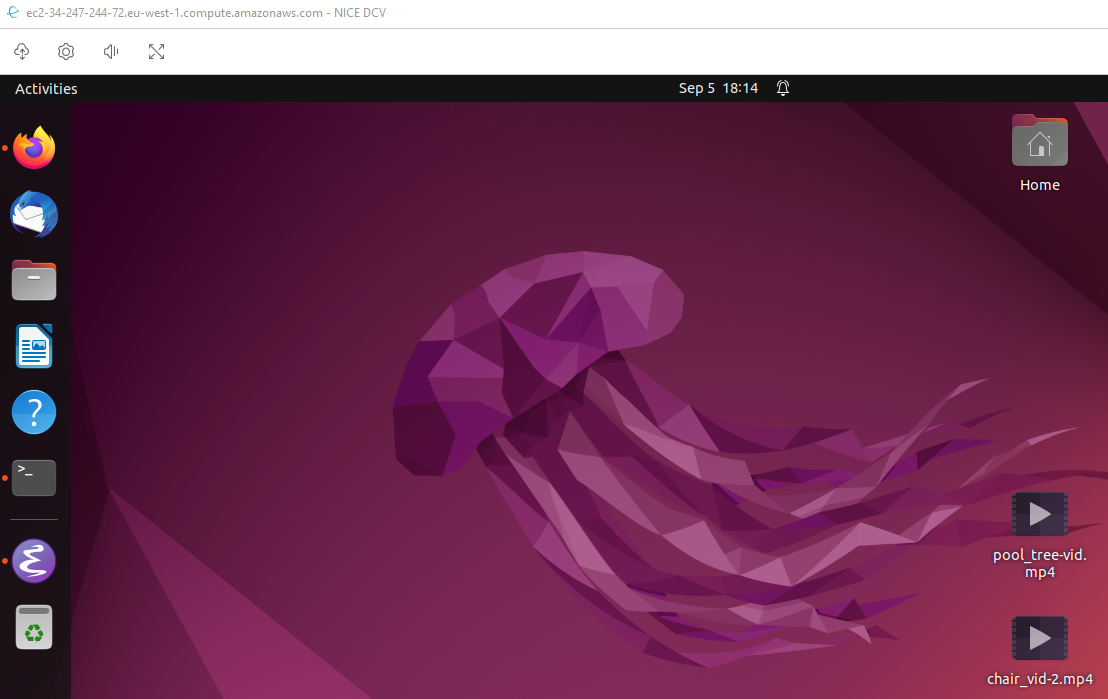
On the desktop you can find a NeRF sample folder to get an impression of the potential of NeRF. Just open it with the file browser (double-click) and double-click a video to watch.
2. Upload the input movie or images
First we need a movie optimally in mpg or mp4 format which we upload to our server (you can also use one of the sample videos accessible via the NeRF link on the desktop to start with).
Click on the upload button to the upper left to open the storage manager and click “Upload File”:

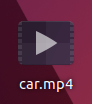
The uploaded file will be stored on the Desktop – in this case called “car.mp4”:
3. Run Feature extraction and start the GUI to create 3D scenes with Nerfstudio
First the movie will be split into different images depending on the frequency setting on when images should be taken from the movie (default is to create about 100 – 300 images to get a good base of the neural network). FYI: as Nerfstudio includes instant-ngp as well we have removed the separate instant-ngp installation.
cd $HOME/nerfstudio
source ns-venv/bin/activate
# copy the file form the desktop to a new data directory
mkdir data/car
cp ~/Desktop/car.mp4 car/
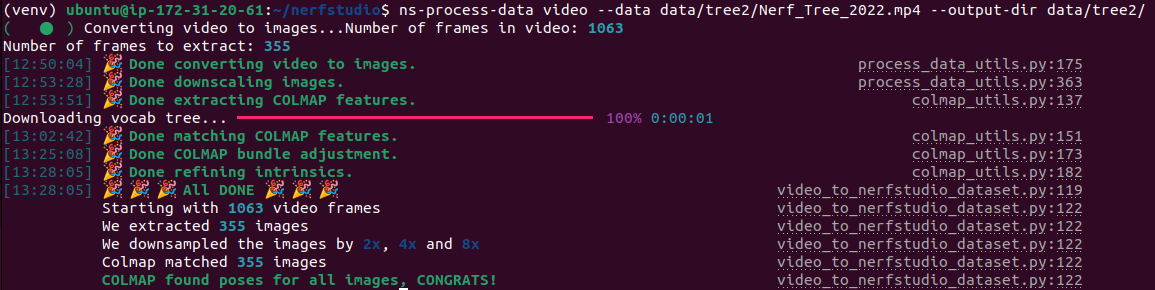
ns-process-data video --data data/car/car.mp4 --output-dir data/car
The output looks as follows:
Now start the training (other NERF training options are available as well including instant-ngp – just query with ns-train -h ):
ns-train nerfacto --data data/tree2
Leading to the following output:

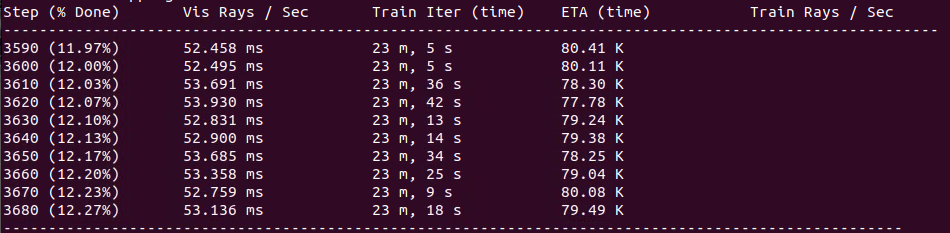
The training information will look like:
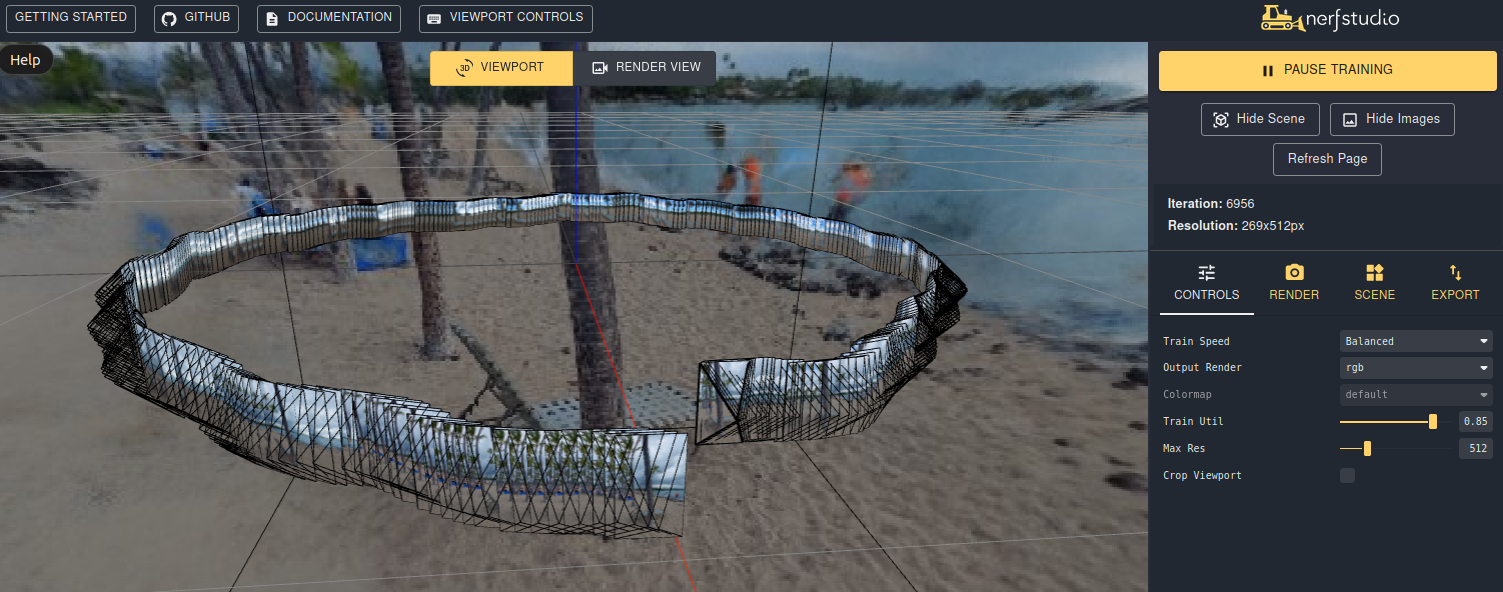
The GUI can be started via a link entered in firefox in the DCV remote desktop similar to: https://viewer.nerf.studio/versions/23-04-18-0/?websocket_url=ws://localhost:7007 displayed in the output above. Opening the link starts the training visualization:
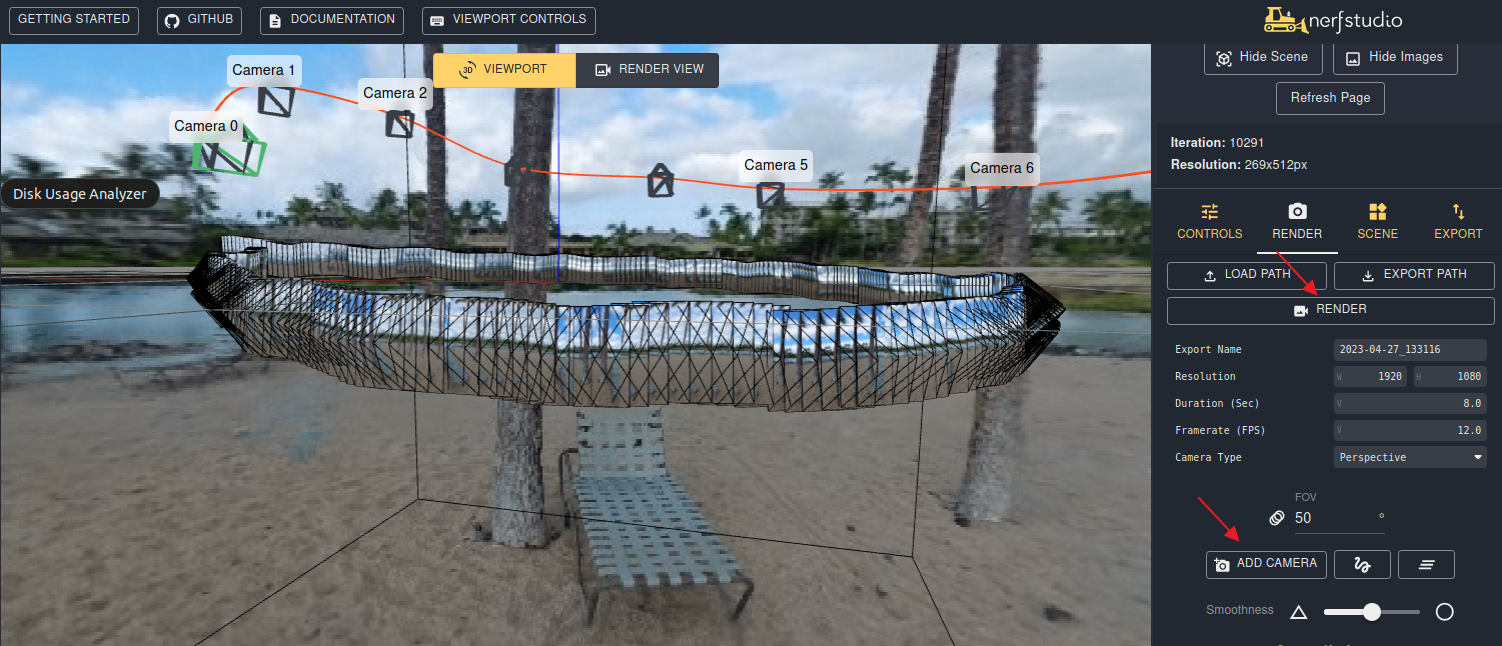
5. Render the movie of the 3D scene stored in the neural network
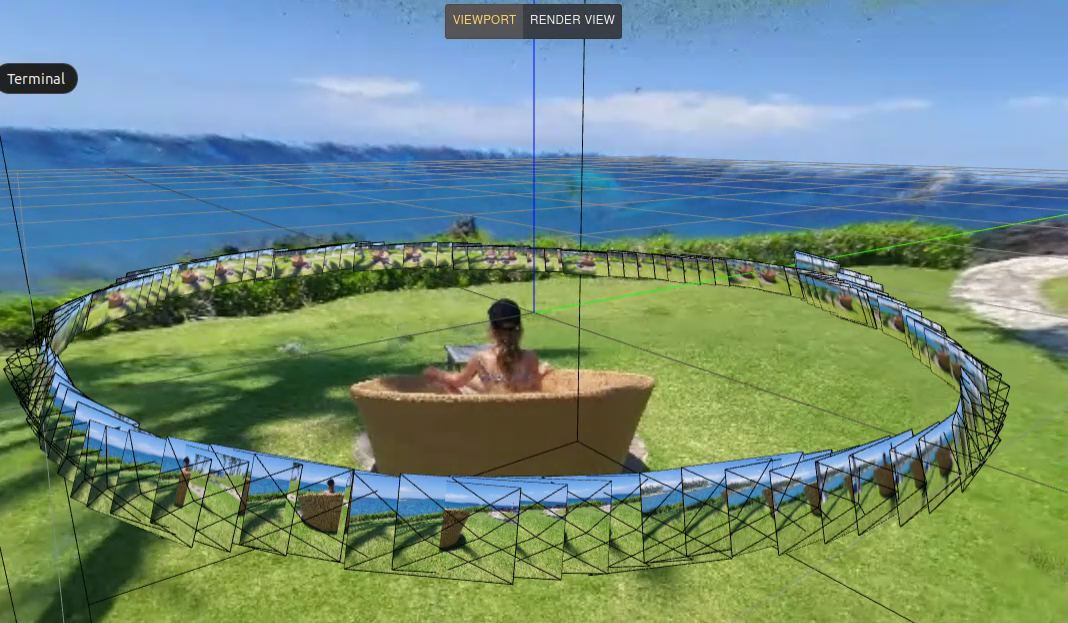
After pausing the training you can switch to the Render view:  , shift the view to the right position, click on “ADD CAMERA” and repeat these steps until you have a proper camera path.
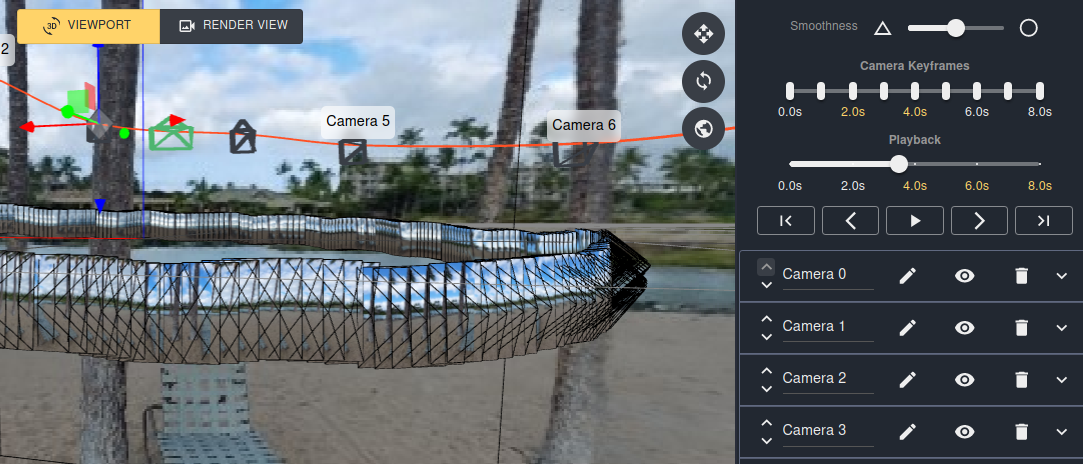
The camera locations can be edited after scrolling down the menu on the right side:
After finishing the camera path click the “Render” button and a pop-up will show the command to use on the command line to start the rendering similar to (feel free to adapt the outputfile name after output-path):
ns-render --load-config outputs/tree2/nerfacto/2023-04-27_133116/config.yml --traj filename --camera-path-filename data/tree2/camera_paths/2023-04-27_133116.json --output-path renders/tree2/2023-04-27_133116.mp4
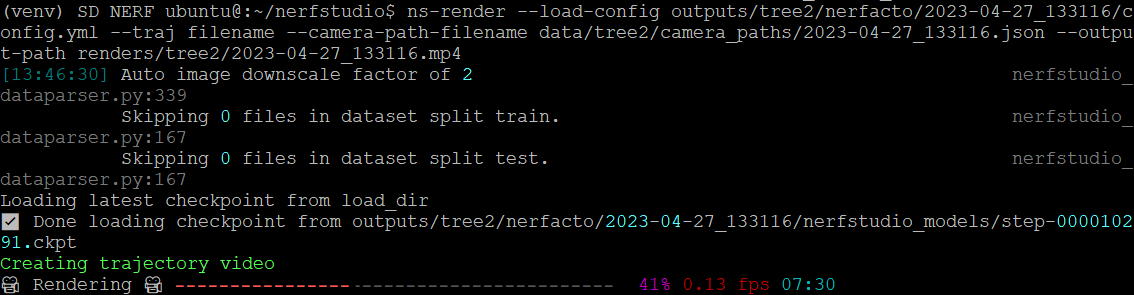
Example output of the movie generation process. Depending on the performance of the GPU, length of the movie and complexity of the scene the movie generation can take between a few minutes up to hours. The remaining rendering time will be displayed blueish at the end:
until the rendering is completed:
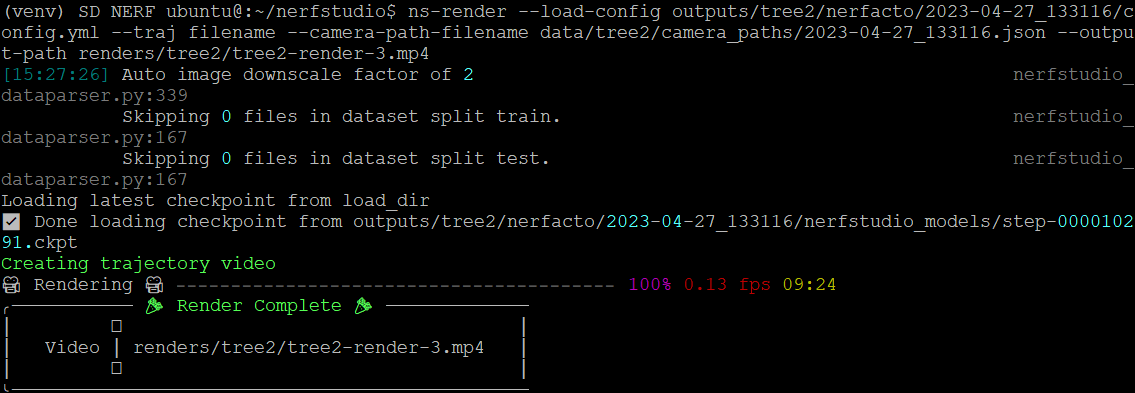
After rendering has finished the movie will be stored with a time-stamped name shown in the command into the renders directory by default.
Summary of How to Run Nerfstudio and More Background
The NeRF AMI also includes the powerful Nerfstudio integration of different NeRF solutions. From the Nerfstudio github page:
Nerfstudio provides a simple API that allows for a simplified end-to-end process of creating, training, and testing NeRFs. The library supports a more interpretable implementation of NeRFs by modularizing each component. With more modular NeRFs, we hope to create a more user-friendly experience in exploring the technology. Nerfstudio is a contributor-friendly repo with the goal of building a community where users can more easily build upon each other’s contributions.
Nerfstudio can be accessed on the Nerfstudio server as follows:
cd $HOME/nerfstudio
source venv/bin/activate
# resulting prompt similar to: (ns-venv) ubuntu@ip-172-31-4-51:~/nerfstudio$
# Sample Nerfstudio commands to download the poster sample
ns-download-data nerfstudio --capture-name=poster     # download sample poster data, maybe via link from gdrive for the 715MB data
# in case of download from gdrive:
# mv ~/Downloads/poster.zip data/nerfstudio/; cd data/nerfstudio; unzip  poster.zip; ln -s posters_v3 poster; cd ../..
# -- OR -- convert your own video with
# ns-process-data video --data data/tree2/Nerf_Tree_2022.mp4 --output-dir data/tree2/
# start the following command in a desktop session to see the viewer
ns-train nerfacto --vis viewer --data data/nerfstudio/poster   # train poster data with interactive viewer
# the URL will be shown which can be double-clicked to open the viewer in firefox
# after creating the camera path and saving it you can render the movie
ns-render --load-config={PATH_TO_CONFIG} --traj=spiral --output-path=renders/output.mp4    # render video output
More Nerfstudio resources:
- Nerfstudio on Github: https://github.com/nerfstudio-project/nerfstudio
- Nerfstudio documentation: https://docs.nerf.studio/en/latest/quickstart/first_nerf.html
- Nerfstudio discord server for questions and answers: https://discord.com/invite/RyVk6w5WWP


