NICE EnginFrame is a feature-rich and very versatile portal framework dedicated to VDI session and HPC job and data management. You can find more information here.
The script below automatically installs NICE EnginFrame on Redhat/CentOS 6.x, 7.x and 8.x and an existing SLURM cluster and targets a single node installation. You can build and install SLURM with our automatic SLURM installation script. By using this script you accept the EnginFrame EULA. To install EnginFrame you need a trial license which you can request here. Further information can be found in the EnginFrame Quick Start Guide. In case of multi-node visualization please make sure the directory /opt/nice/enginframe/sessions/ is shared among all nodes and users are know on all nodes.
After the EnginFrame installation part the script shows how to enable SSL for EnginFrame using Apache. The EnginFrame installation jar comes with an easy to use installation wizard as well which supports the integration of schedulers like SGE, LSF, PBSPro/OpenPBS, Torque, … as well as the DCV Session Manager for VDI so please feel free to try those in addition. The EF installation wizard creates the config-file which has been embedded below into the installation script to configure EnginFrame.
DCV Session Manager Setup
In case you use another scheduler than the DCV Session Manager to schedule VDI session on Windows and Linux you can skip this part.
To allow EnginFrame to interact with DCV Session Manager, you need to register EnginFrame as a Session Manager API client (EF is the sample client name here) which provides us with the client-id and password:
# dcv-session-manager-broker register-api-client --client-name EF
client-id: 5ee022b4-9307-4a08-bebb-0320c716cc9d
client-password: OGMzYTk5MDgtODNjNC00Y2U4LTg2ODEtZDFmMmZjMzRjMDk5
In the EnginFrame installation configuration we need to enter the respective Session Manager information which is then stored in the file $EF_TOP/conf/plugins/dcvsm/clusters.props (permission 600) as example for Session Manager cluster dcvsm_cl1 with Session Manager host sm-host (we use the default port 8443 for client to broker communication, or in case we adapted it to 8448 we replace 8443 with 8448):
# cat $EF_TOP/conf/plugins/dcvsm/clusters.props
DCVSM_CLUSTER_dcvsm_cl1_AUTH_ID=5ee022b4-9307-4a08-bebb-0320c716cc9d   # example
DCVSM_CLUSTER_dcvsm_cl1_AUTH_PASSWORD=OGMzYTk5MDgtODNjNC00Y2U4LTg2ODEtZDFmMmZjMzRjMDk5 # example
DCVSM_CLUSTER_dcvsm_cl1_AUTH_ENDPOINT=https://sm-host:8443/oauth2/token
DCVSM_CLUSTER_dcvsm_cl1_SESSION_MANAGER_ENDPOINT=https://sm-host:8443
DCVSM_CLUSTER_dcvsm_cl1_NO_STRICT_TLS=true
where dcvsm_cl1 is the name of the Session Manager cluster as stored in $EF_TOP/conf/plugins/dcvsm/dcvsm.efconf:
DCVSM_CLUSTER_IDS=dcvsm_cl1EnginFrame Installation Script
You can execute the script at once (download EnginFrame Installation Script) or step by step to monitor the execution of the single steps. You you want step-by-step, please open the script with any text processor and copy and paste each line.
The old EnginFrame 2019 installation script can be downloaded here as well. Here are the links:
EnginFrame Portal manual installation
This guide will help you to manually setup EF Portal for any linux distributions based in Debian (like Ubuntu) or Red hat (like CentOS, Alma Linux and Rocky Linux).
Linux Debian based (like Ubuntu)
- We recommend to update your distribution:
sudo apt update
sudo apt -y upgrade - Get the last EF Portal version clicking here.
- Setup Java:
sudo apt -y install openjdk-11-jdk - Create the users:
sudo adduser efnobody
sudo adduser efadmin - Copy your license file to a directory that you easy can remember, because you will need to write the full path during the installation procedure.
- Now you can execute the installer:
sudojava -jar enginframe-2024.0-latest.jar - Start and enable the service:
sudo systemctl start --now enginframe - Change the efadmin password with the command:
passwd efadmin - Access the EF Portal using the URL: https://serverip:serverport
Linux Red Hat based (like CentOS, Alma Linux and Rocky Linux)
- We recommend to update your distribution:
yum update -y - Get the last EF Portal version clicking here.
- Setup the JRE:
sudo yum -y installjava-11-openjdk - Create the users:
sudo adduser efnobody
sudo adduser efadmin - Copy your license file to a directory that you easy can remember, because you will need to write the full path during the installation procedure.
- Now you can execute the installer:
sudojava -jar enginframe-2024.0-latest.jar - Start and enable the service:
sudo systemctl start --now enginframe - Change the efadmin password with the command:
passwd efadmin - Access the EF Portal using the URL: https://serverip:serverport
Installing without interaction
You can create a efinstall.config file that will answer all questions, allowing you to have a silent install.
To create the efinstall.config, please create a temporary server and manually setup the EF Portal. In the end of the process, the efinstall.config file will be created.
Enabling EnginFrame Views Desktop Services
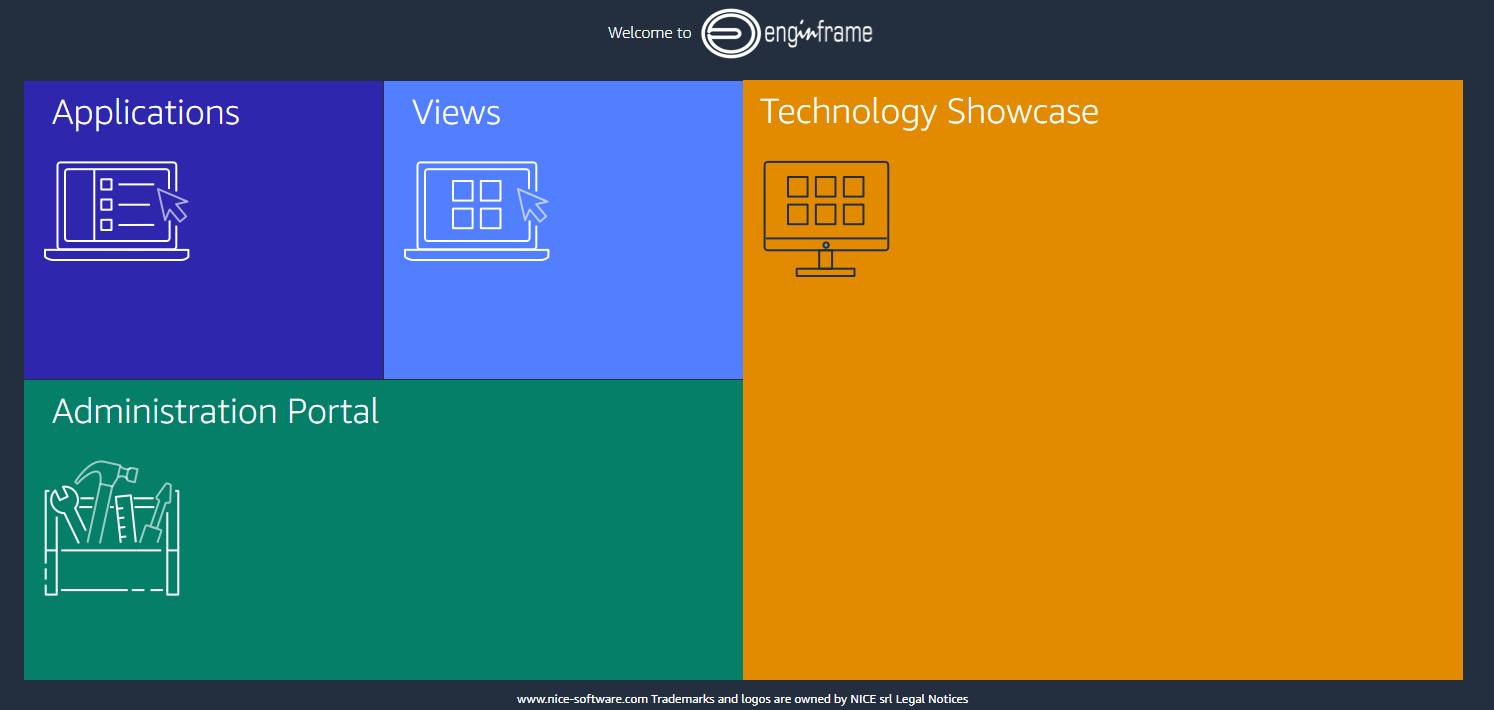
After a new installation of EnginFrame you might want to enable the Linux or Windows Desktop service. Here are the steps – first login to the “Virtual Desktop/Views” portal as EF Admin user:
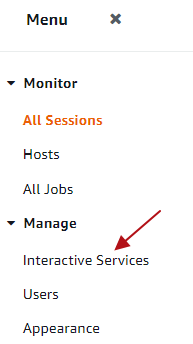
Then click on “Admin’s Portal” to the upper right:

and then click on “Interactive Services” in the left menu:
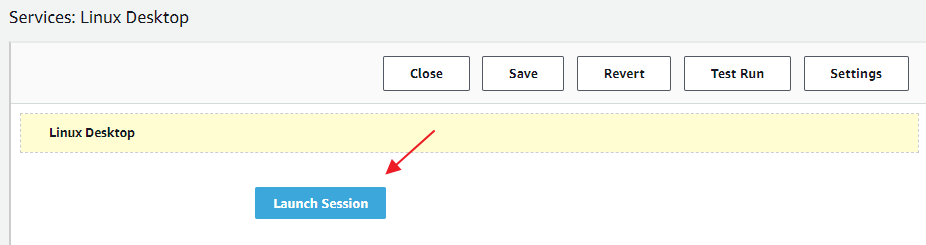
Click on the blue link of service you want to enable – e.g. “Linux Desktop” and then in the Service Editor on the “Launch Session” Button:
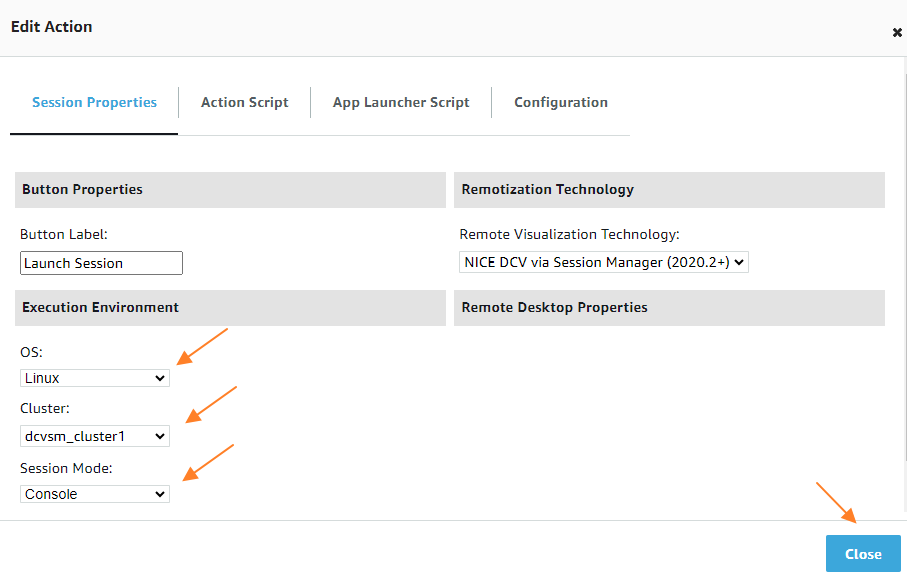
In the configuration you can configure and verify your OS, the Cluster to use and the Session Mode. Then click “Close” to confirm the values:
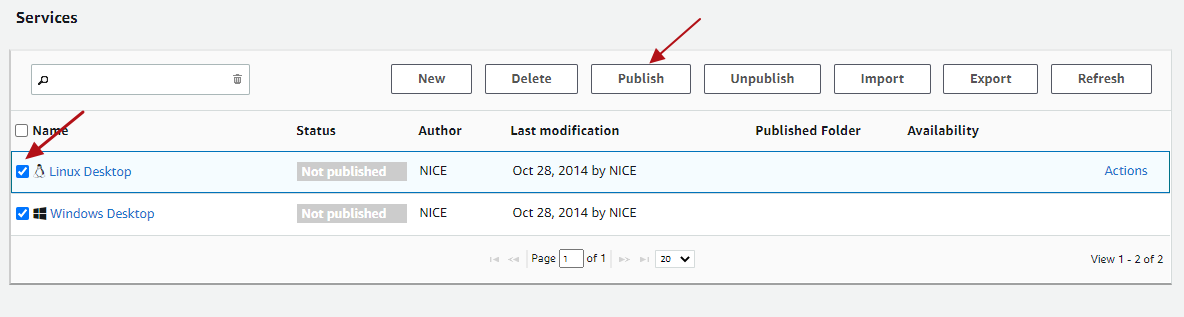
As next step you can “Save” and “Close” the service editor and you will see the services overview where you then can select and “Publish” the respective desktop services:
Switch to “User View” in the upper right and you can see the new service enabled in the left menu.
Configuring NICE DCV to use External Authentication of the DCV Session Manager Broker
With EnginFrame Views Single-Sign-On (SSO) you can login to the DCV session automatically. EF Views will create a session token which is then verified by DCV using the Auth Token Verifier of NICE DCV Session Manager (SM) Broker.
In case of NICE DCV on Windows the configuration is in the registry. You can copy the broker self-signed CA to C:\Program Files\NICE\DCVSessionManagerAgent\conf\dcvsmbroker_ca.pem. For the auth-token-verifier please specify the URL for the token verifier on the Broker replacing the hostname in the example below:
REM Settings example
REM HKEY_USERS\S-1-5-18\Software\GSettings\com\nicesoftware\dcv\security\auth-token-verifier = https://ip-172-31-4-230:8445/agent/validate-authentication-token
REM HKEY_USERS\S-1-5-18\Software\GSettings\com\nicesoftware\dcv\security\ca-file = C:\Program Files\NICE\DCVSessionManagerAgent\conf\dcvsmbroker_ca.pem
REM HKEY_USERS\S-1-5-18\Software\GSettings\com\nicesoftware\dcv\security\no-tls-strict = 1
REM Powershell:
New-ItemProperty -Path "Microsoft.PowerShell.Core\Registry::\HKEY_USERS\S-1-5-18\Software\GSettings\com\nicesoftware\dcv\security" -Name auth-token-verifier -PropertyType STRING -Value "https://ip-172-31-4-230:8445/agent/validate-authentication-token" -Force
New-ItemProperty -Path "Microsoft.PowerShell.Core\Registry::\HKEY_USERS\S-1-5-18\Software\GSettings\com\nicesoftware\dcv\security" -Name ca-file -PropertyType STRING -Value "C:\Program Files\NICE\DCVSessionManagerAgent\conf\dcvsmbroker_ca.pem" -Force
New-ItemProperty -Path "Microsoft.PowerShell.Core\Registry::\HKEY_USERS\S-1-5-18\Software\GSettings\com\nicesoftware\dcv\security" -Name no-tls-strict -PropertyType DWORD -Value 1 -Force
In case of NICE DCV on Linux you can configure external authentication in /etc/dcv/dcv.conf (for ca-file, please specify the path to the broker’s self-signed CA copied to the host previously. For auth-token-verifier, specify the URL for the token verifier on the Broker replacing the hostname example below):
[security]
administrators=["dcvsmagent"]
ca-file="/etc/dcv-session-manager-agent/dcvsmbroker_ca.pem"
no-tls-strict=true
auth-token-verifier="https://ip-172-31-4-230:8445/agent/validate-authentication-token"
After the configuration please restart the DCV server. Any questions just let us know. Read more about NICE DCV.


